
last year during celebrate the boy one of the tutorials i loved & included in my roundup was the "make a boy's tie from a man's tie" from marigold of "hideous! dreadful! stinky!" - so cute! so when the talented marigold wrote to me about her new etsy shop "stinky boy!" i was excited! it just opened yesterday so go show her some luv. the shop will be filled with handmade goodies for fellas like the monster tote and toy holster shown below.


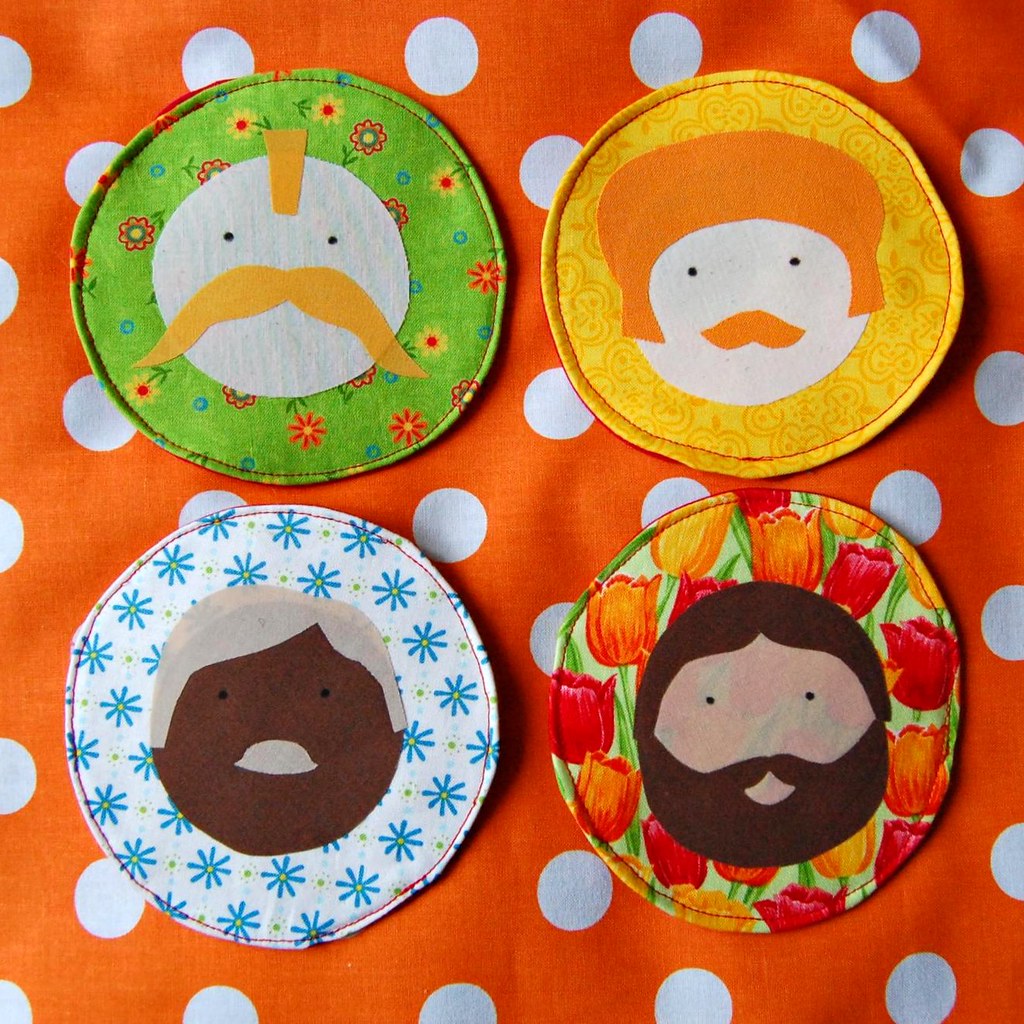
when she asked to come on and share a fab tutorial with you all i was even more excited...and i of course, said YES! i mean honestly, check out these friggin adorable macho men portrait coasters! fabulous!!!! i cannot wait to make some!
now let's hear from marigold...
Hello! I'm Marigold from Hideous! Dreadful! Stinky! and I'm excited to share a tutorial on my Macho Men Coasters. The idea for these coasters was born last spring when I made a set of Family Portrait Coasters as a housewarming present for some friends. The Daddy coaster in that set had a full beard, and I thought it would be so fun to make a set of bearded and mustachioed men. I have developed a template where you can mix-and-match hair pieces and facial hair to create the Macho Men of your dreams!
For EACH coaster, you will need:
Supplies:
2 pieces coordinating fabric, at least 5” square
1 piece flannel for interfacing, at least 5” square
scraps of fabric in skin and hair tones, at least 2.5” square each
double stick fusible web (e.g. Lite-Steam-a-Seam 2)
free templates:
PDF of Macho Men Coasters page 1
PDF of Macho Men Coasters page 2
Tools:
sewing machine
coordinating/contrasting thread
marking chalk/marker
iron
permanent fabric marker (in preferred eye color)
turner or knitting needle

Print template pieces onto cardstock and cut them out.
Trace and cut out 5” Circles from your 2 pieces of coordinating fabric and 1 piece of flannel interfacing. For each coaster, you should have (3) 5“ circles.
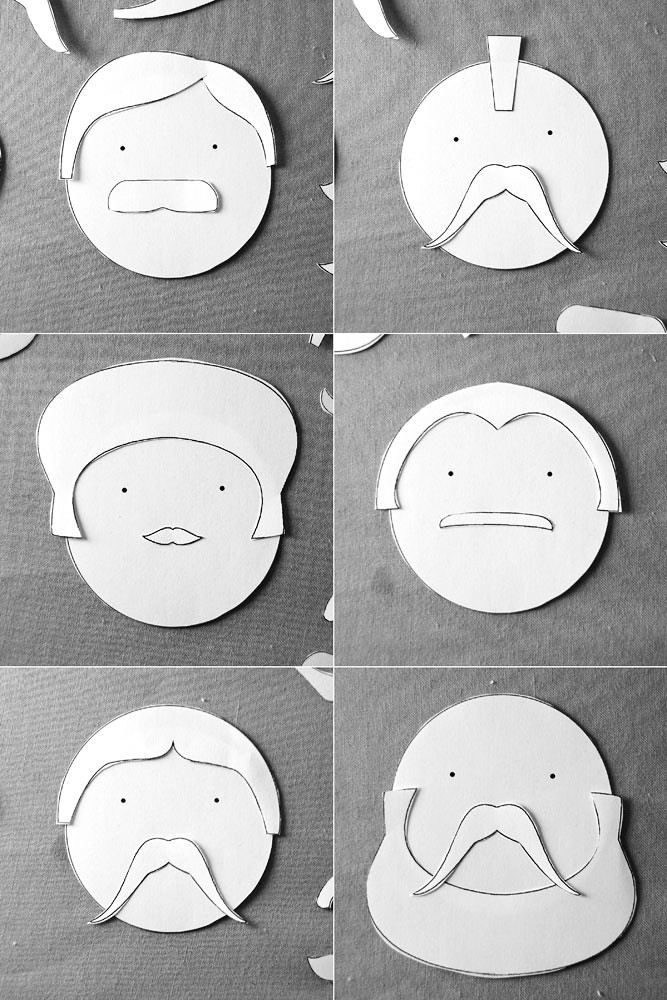
Lay out the 2.5” paper template and use the paper hair and mustache templates to create the Macho Man of your dreams.
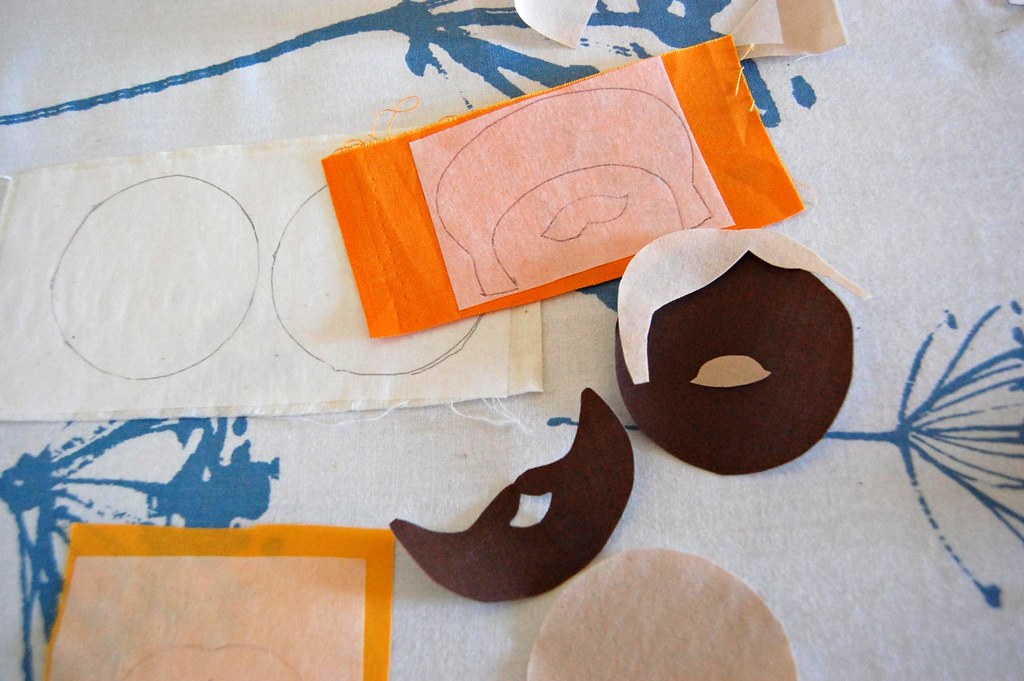
Follow manufacturer directions for your double stick fusible web to apply it to the backs of your skin and hair tone fabrics. For Lite-Steam-a-Seam 2: cut out a piece of the fusible web and peel off one side of the backing. Place it sticky-side down to the back of your fabric and lightly steam iron it on. You can trace onto the remaining paper backing (make sure you reverse any asymmetrical pieces), then cut out your pieces.
You will need (1) 2.5” circle for the face and enough fabric for your chosen hair and mustache pieces.
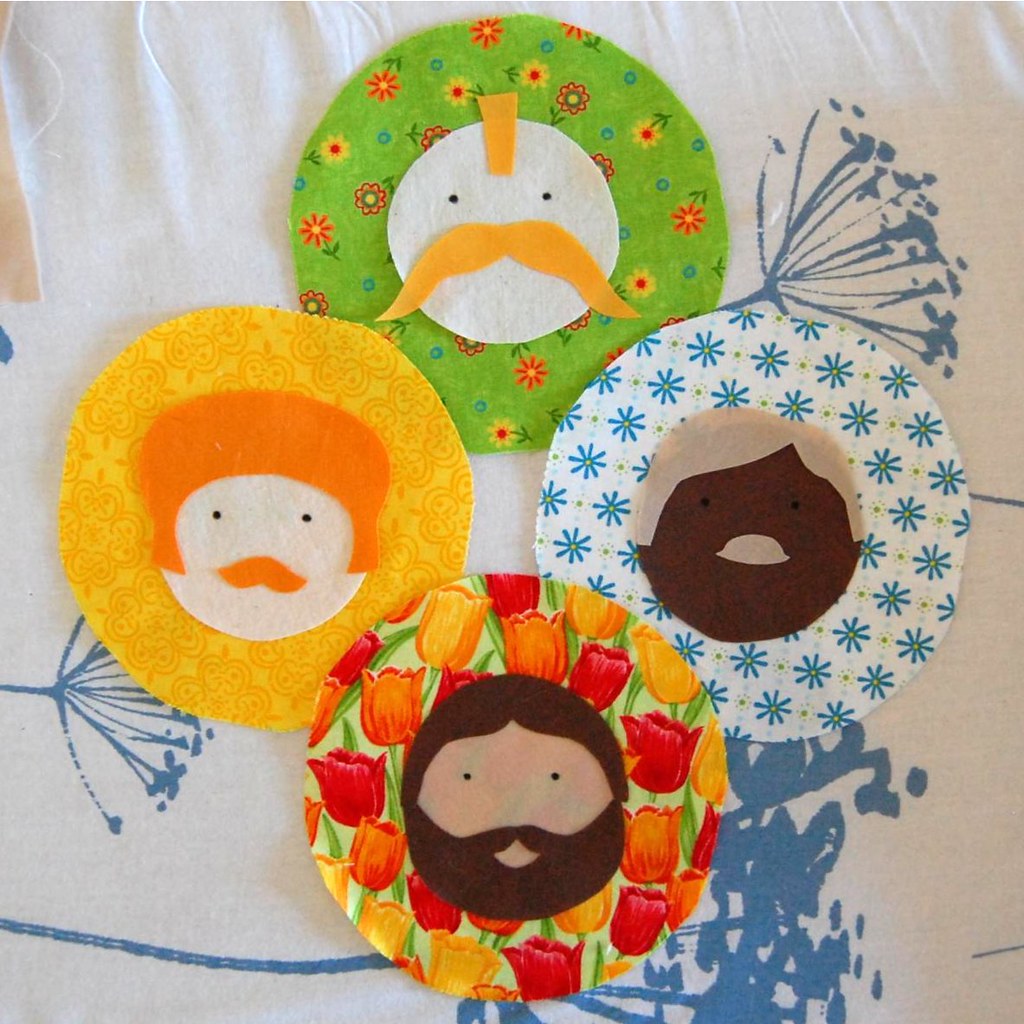
Recreate your Macho Man using the fusible-web backed fabric pieces onto the front of your coaster. (If using Lite Steam-a-Seam 2, be sure to remove the remaining paper backing. For other fusible webbing, follow manufacturer's instructions.) Iron into place following manufacturer’s instructions for the double stick fusible web.
Use a permanent fabric marker to make two small dots for the eyes (alternately, you can make french knots for eyes using embroidery thread.)
Do any detail stitching by hand or machine. The fusible web should have created a permanent bond, so any stitching you do now is purely decorative.
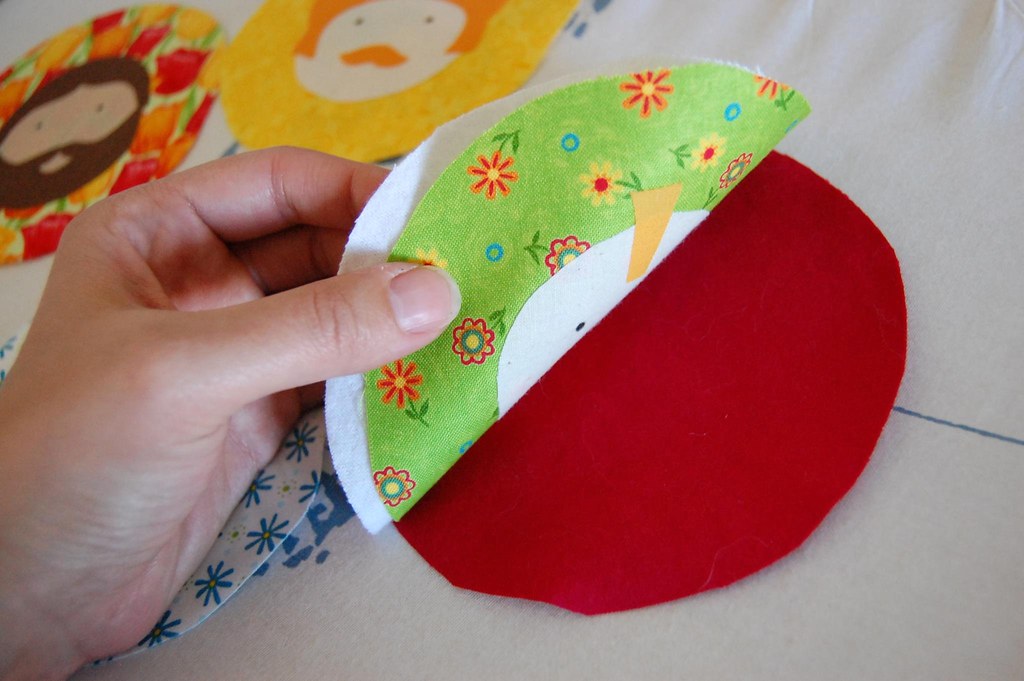
Place the front and back pieces together, right sides facing, and place the flannel piece on top.
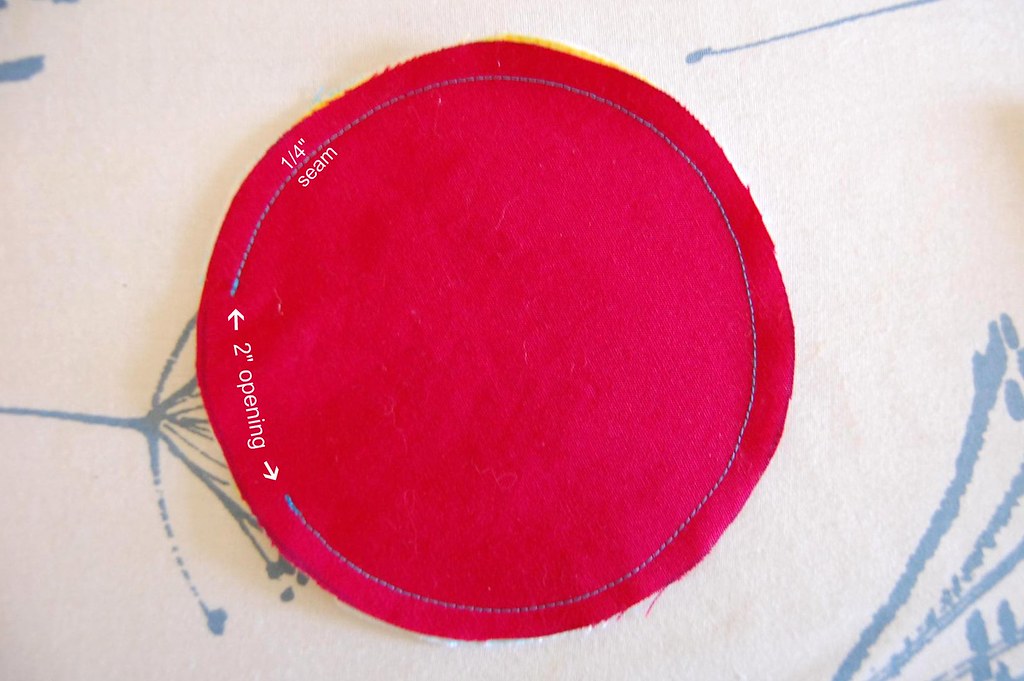
Stitch 1/4” seam around the edge, leaving a 2” opening for turning.
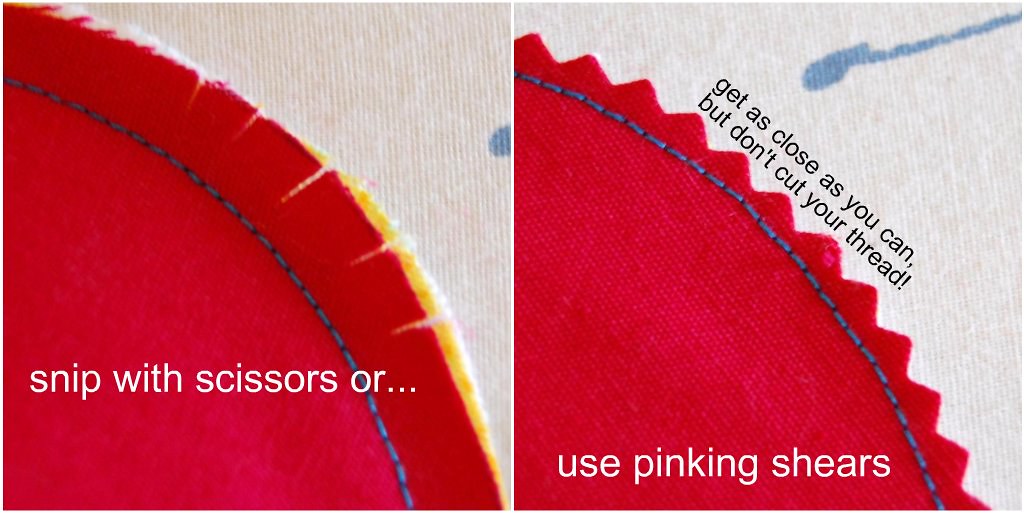
Snip all the way around the circle or use pinking shears and trim as closely as possible to your stitching line. Be careful not to cut the thread.
Turn right-sides out (make sure you turn out the proper two fabrics, not the interfacing) and use a turner or blunt knitting needle to press against the inside seam. Finger press the opening until it looks neat. Press with iron.
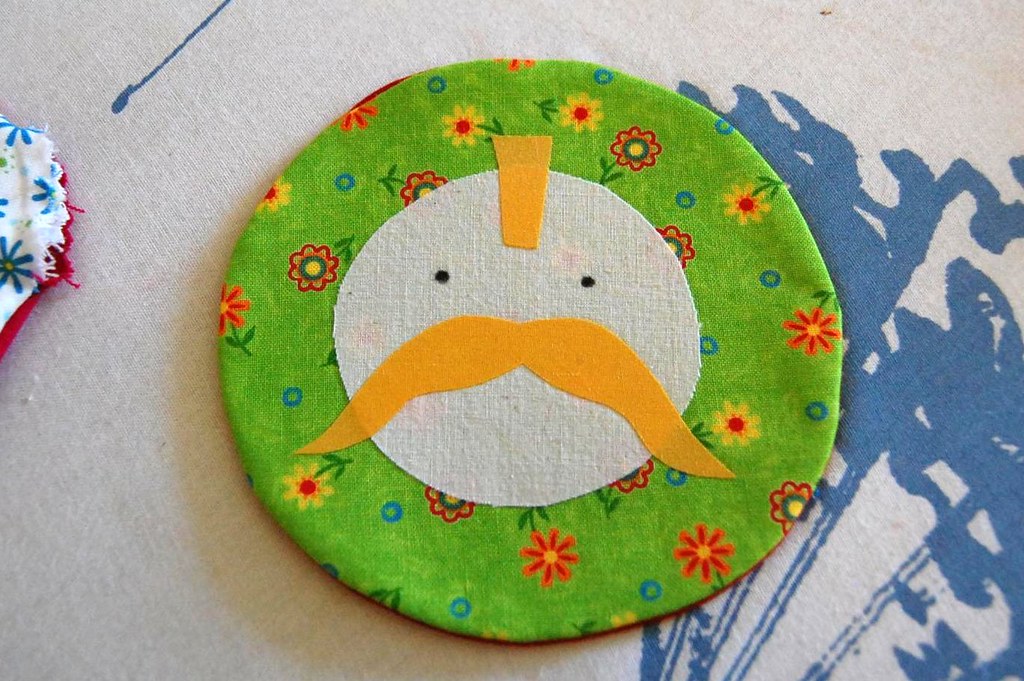
Top stitch all the way around the circle, in a contrasting thread if desired.
And that's it! There are so many variations you can do on these coasters. If you make a set, I would love to see it in my Flickr group.
Thank you, Shannon, for having me on your awesome blog!
thank you marigold, for sharing this fun tutorial and for giving us more awesome boy goodies to make & buy for the little fellas in our lives! you rock! look to see more from marigold during "celebrate the boy" month on made and made by rae starting feb. 15th!
what fabric would you use for these? are you planning on making some? i can't wait to make a set with mackenize. #4 reminds me of my hubby when his beard grows in..hahha!