when i opened my inbox the other day and saw what katy from the addictive blog "no big dill" had whipped up for comfy sews VS cozy knits i swear i squealed and ran around the house doing a happy dance! wowsa! when she told me she was planning a cardigan i thought great, but this is fantastic. so simple yet so fabulous!!!!!!!!!!!!! comfy, stylish and easily personalized. i've been so excited to show you all!

if you haven't been over to visit no big dill, make sure you go. katy is a busy mom of 5, yes i said 5, gorgeous kiddos. i have to admit that katy's blog is one of the blogs that i am a lurker on. i never comment, just stare in awe at all she creates and of course, how gorgeous and stylish she is. i would like to know how she stays so slim after 5 babies and how she has the time to sew & blog. i find it hard enough with 2 nevermind 5! i'm always so busy cleaning up my drool after staring at all the goodies she makes that i can't manage to type my thoughts to her posts.

katy, i bow down to you. thank you for all of your lovely & amazing tutorials, inspiring photographs, humour, wit and the power you have to make me want to drop everything i'm doing and become a better sewer. and thank you for actually answering my first email ever to you asking you (while crossing my fingers you would say yes) to come join in on the fun over in the momyhood - you rock! i hope it's only the beginning and we can share many more emails in the future.
now let's hear from katy....
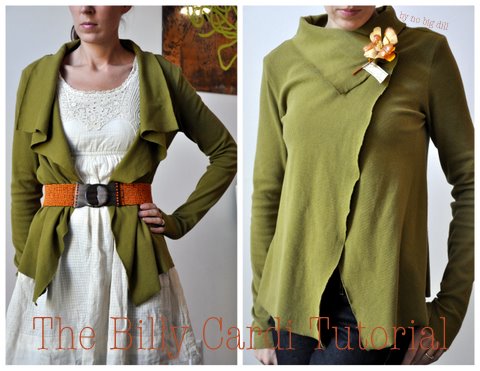
The Billy Cardi
I'm gloved and ready for my time in the ring!
Thanks, Shannon, for letting me duke it out here at luvinthemommyhood today.
I never knew my cardio kickboxing VHS would actually come in handy for using my uppercut, thanks, Billy Blanks.
What do the sews have that the knits don't? Well, a lot. But one in particular is the ability to snip here and there without redoing the whole thing: raw edges, of course! So I thought we sewists could use that to our advantage in this piece. Not only raw edges, but inside out seams. Whoa. We're getting crazy over here!
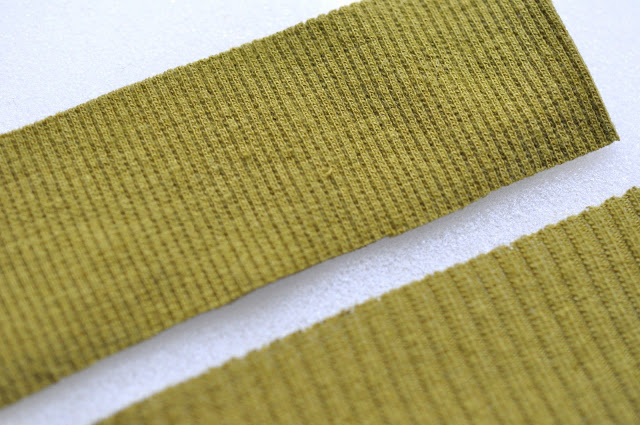
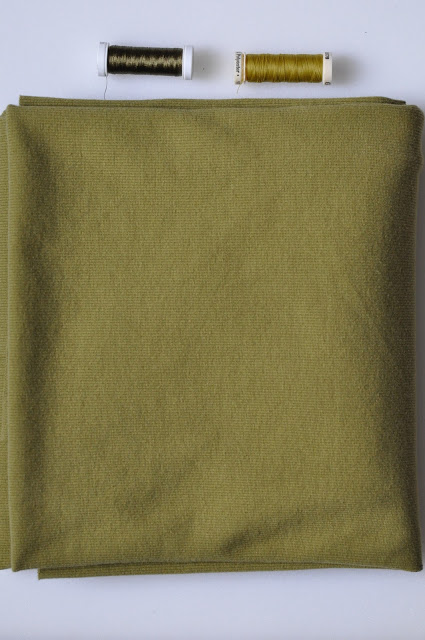
What I chose as my muse? Ribbed knit.
Ribbed knit is so stretchy and forgiving and COMFY!
You can see the ridges in the fabric that give it that extra s t r e t c h.
You'll need:
2-3 yards [depending on size and width]
Thread*
A long sleeve t-shirt pattern OR an old t-shirt cut along the seams that is pre-washed/dried, we don't want any shrinkage after we've put all this effort into our new cardi.
Butcher or freezer paper
and
just a bit of courage ;)
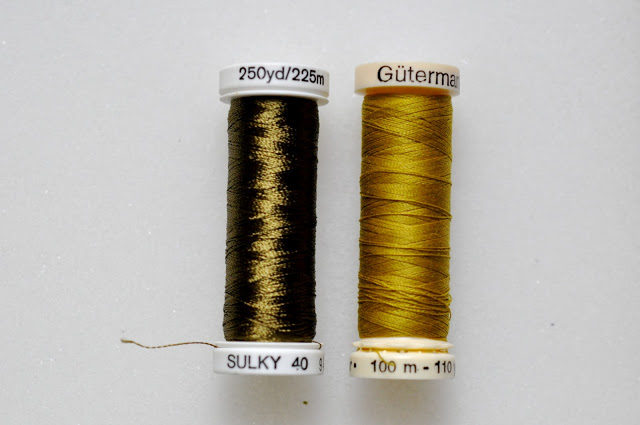
*Let's talk thread before we begin throwing punches.
I used a regular polyester for the primary sewing
For the decorative stitching [more on that later] I used Sulky thread which you should not use for seams as it is a very weak thread, but provides some shine to your stitches. I used a shade darker for even more of a statement, but you can certainly use the same thread as your seams if you'd like.
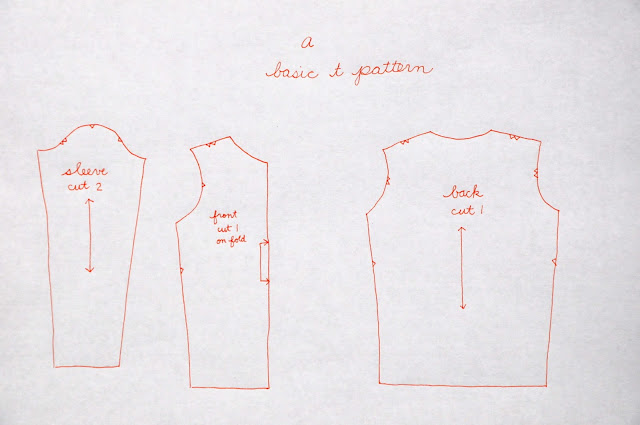
If you are using an old t-shirt, trace each piece on some paper, adding 1/2" seam allowance around the whole thing, but don't cut it out yet. This is basically what you should end up with:
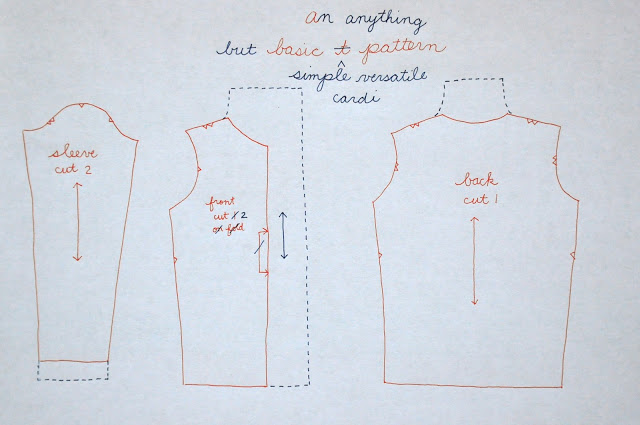
Next, we're going to add some COMFY changes:
lengthen the sleeve 2-3 inches
extend the front neck up at the stitching line (1/2" from edge) and out 8-10" and down
extend the back neck up and out and down to other side
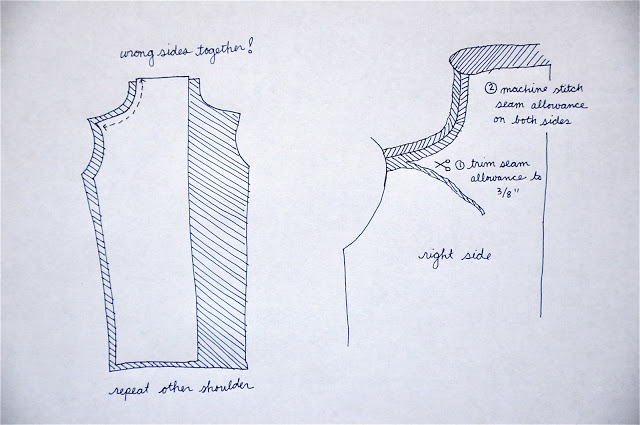
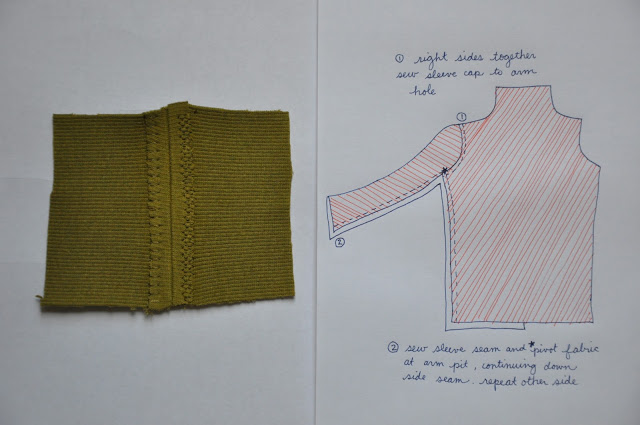
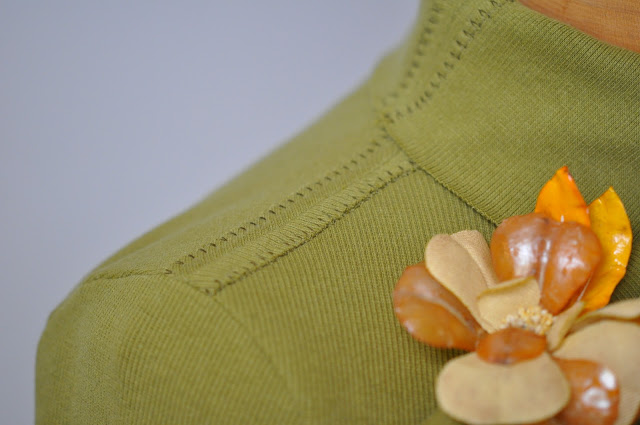
This might hurt as you do it and cause great anxiety, but you're going to put WRONG SIDES TOGETHER for the shoulder/neck seams. Bare with me. Stitch with a very slight zig-zag [as in you can barely tell] which will still allow stretch for the fabric. This seam allowance will be visible on the outside of the garment. Hang in there! Trim seam allowance to 3/8" on both sides, pin flat and use a decorative stitch on the very edge.
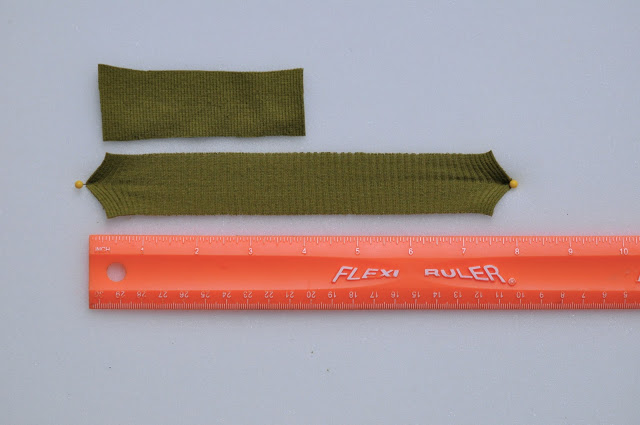
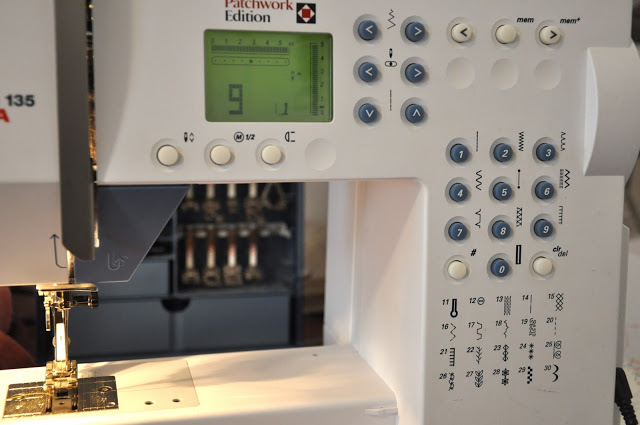
Test this decorative stitch on a scrap! Trust me, those decorative stitches are like teeth knocked out to remove. Trust me. Really, just trust me on this one. I chose a blanket stitch [#9 on my machine.] But I also increased both the length and width of my stitch to the maximum to make it a big stitch.
I would suggest not using a plain zig-zag stitch, though. We want it to look homemade in a good way. Next stitch the sleeve cap in with RIGHT SIDES TOGETHER in the arm hole. No need to do a double basting stitch on the sleeve cap. Just match notches, pin in place and stretch it to fit. Your final stitching will be the sleeve seam, keep your needle in the "down" position at the armpit, pivot and stitch the side seam as well. Repeat on other sleeve/side seam. All other edges are left raw and provide some nice draping effects.
I tested a couple different stitches to see which one I like.
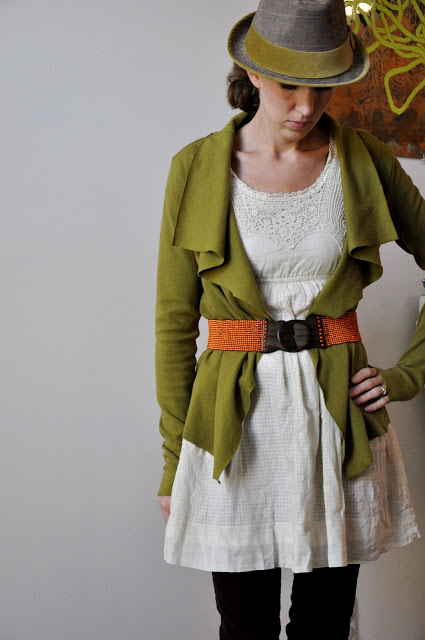
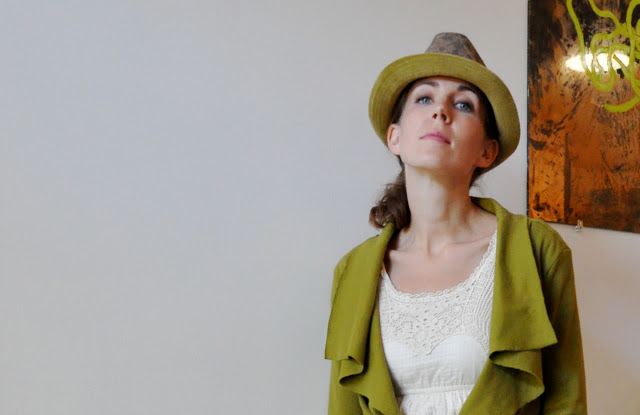
You can wear it belted and open.
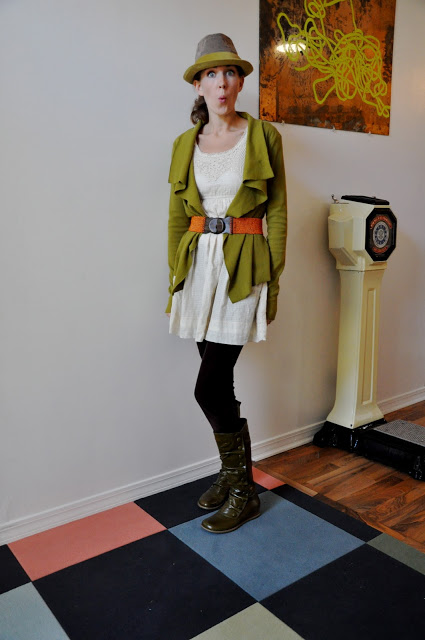
and those extra long sleeves? So comfy and warm.
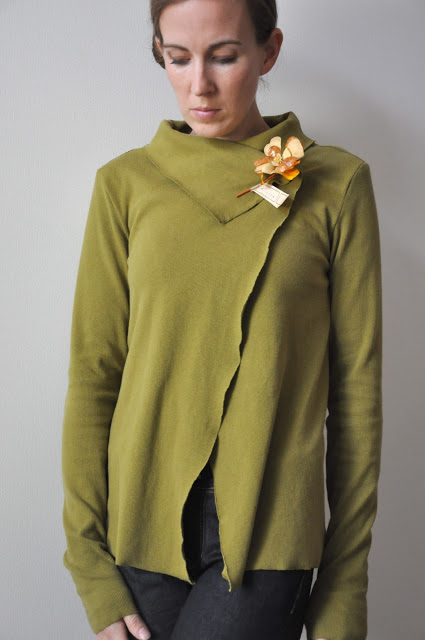
Or, for a more sophisticated look, fold one side over the other and pin in place
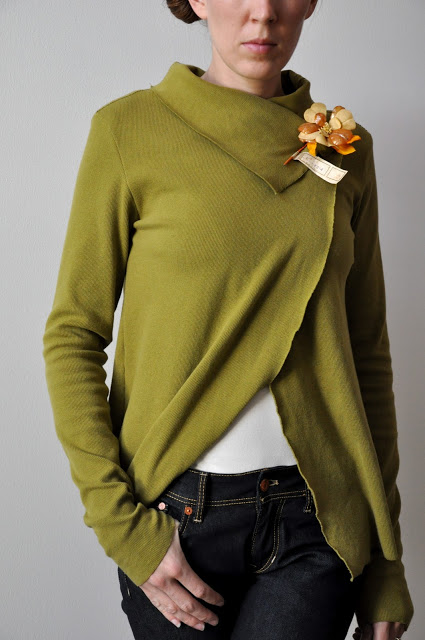

I love how the decorative stitching looks like a faux epaulette. Who doesn't love an epaulette?
GO COMFY SEWS!!
You up for the challenge, knits?
ohhhhhhhhhh, so fun! in the words of rachel zoe...."I. Die."
make sure you sport our button to help join in the battle! who's gonna win? who are you rooting for? i've got a lot more fun coming your way next week! some new tutorials (some from guests & maybe some from me), a giveaway, and our last round of boxing.
make sure you sport our button to help join in the battle! who's gonna win? who are you rooting for? i've got a lot more fun coming your way next week! some new tutorials (some from guests & maybe some from me), a giveaway, and our last round of boxing.
i know there hasn't been a weekend wishes lately (hope you all don't mind) and i wanted to let you know they will be back :) this weekend i'm hoping to get some wrist warmers done, a tutorial finished, a sewing gift complete and to find that perfect pair of dark wash skinny jeans. cross your fingers for me! what are you guys up to? anyone recommend a great, inexpensive pair of jeans to buy while in between sizes? i'm still losing that baby weight and don't want to spend too much.