mommyhood sewing

Peek-a-Boo Pattern Shop Build a Wardrobe Giveaway!

skinny jeans and playdate v-neck tee
i've got a super fun giveaway for you all today!  kids clothing week challenge over on elsie marley is in full swing this week and amy from peek-a-boo pattern shop and i thought what better time to have an awesome build a wardrobe pattern giveaway than today! yessssss! that's right!  i said wardrobe ladies! peek-a-boo pattern shop is going to help make that dream of yours to have your wee ones sporting a handmade wardrobe a reality!


i put together pics of some of my fave peek-a-boo patterns for this post to get you inspired.  peek-a-boo pattern shop has seriously got a pattern for everything.  amy's got bottoms, tops, dresses, coats, jammies, bathing suits and the list goes on.  she truly pays attention to what your child will want to wear, what you want to make them and the comfort factor.  everything is just so darn cute.  i especially love that there is a wide array of both boys and girls patterns and even pj's. i've always wanted to make the girls pj's and who can resist footie jammies right?
1. oliver & olivia pea coat 2. varsity cowl neck pullover
her patterns are stylish, tested, and perfect for beginners to advanced sewers.  all of peek-a-boo's patterns come with a full tutorial & color photos that are in an easy to print PDF format.  the patterns feature pattern pieces that are computer generated and color coded for easy cutting as well and if you are a beginner sewer amy's even available for help with any of her patterns.
1. molly schoolgirl skirt 2. molly schoolgirl blouse
peek-a-boo patterns are clearly written with easy to understand instructions and are sized from 6 months to 8 years.  you guys know how much i love a large amount of sizes right?  means i can make it over and over again for both my girls.  yay!  you are also allowed to sell items made from peek-a-boo patterns too!  i can never find jeans to fit my girls right and i'm dying to whip up some of those skinny jeans for them for xmas.  so adorable!  there is something for everyone in amy's shop.  some of her patterns even include the pattern for doll sized versions too!
1. hailey ruffled up jacket 2. hopscotch top, tunic & dress 3. annabelle jacket
do you love peek-a-boo patterns as much as i do and can't wait to see if you won?  well guess what?  peek-a-boo patterns is offering all luvinthemommyhood readers a 20% discount until october 16th!!!  just use code "luvin" at the checkout.

you ready to enter?  here's the info...

|  THE PRIZE  |

- one lucky winner will receive their choice of each of the following from the peek-a-boo pattern shop: 1 top, 1 bottom, 1 dress/skirt, 1 outerwear pattern and 1 pajama

|  HOW TO ENTER  |

- simply leave a comment letting me know what your favorite peek-a-boo pattern is.
*bonus entries (remember these are optional) 
  leave a comment letting me know you did any of the following:
- pin a favorite pattern  - like their facebook page  - subscribe to their newsletter  - follow amy's blog

| THE RULES |

- you must leave a valid email address to be eligible to win.
- the giveaway is open until monday, october 15th, 2012.

classic footed pajamas
thank you so much for your generous giveaway amy!  you rock!  such an awesome prize! good luck to all of you, i can't wait to see who is gonna win!


 you can find all things peek-a-boo pattern shop here:


recouping and some eye candy


my baby sister recently had a new baby.  oh my.....i love babies.  i would have 15 babies if they all stayed under 6 months. i'm nuts and love that stage and would do it over and over again.  it's been so fun to have a baby around again since i'm not having anymore.  hard part is that i'm sick so i can't smother him in love like i want to and boy do i love this little guy.  his name is luca and he was a nice, healthy 9lbs 11oz! yep. my sis is a trooper ;)


anyhoo...little luca needed a hat from his auntie so i whipped up this hat by my oh so stylish pal jen geigly using some left over stash of my cozy lion brand thick & quick (love this stuff) and alas the little mans head was way too big for it.  so i ripped that hat out and made a bigger one.  so cute!  i can't wait to see it on him!  i also made him a special blankie (which i'll show you soon) out of stretch and quilting cotton.  a nice yummy combo.

splendor 1920 by bari j for art gallery fabrics
i've also been anxiously awaiting the arrival of splendor 1920 by bari j for art gallery fabrics.  i mean c'mon.....downton abbey is about to start up in january and who could resist a fabric that has your cross stitch pattern all ready to go right on it?  i can't even decide where to start first i have so many wee projects in my mind to use it for. 


so feminine and classic but also modern and fresh. the color palette is also right up my alley.  thank you bari.  this is perfect time for me to snuggle down with the sun shining, a crisp bite in the air, leaves falling and a delish cuppa tea brewing beside me as i work on needlepoint on my lap.  you're awesome!

splendor 1920 and a few floressence
 i also got some floressence from art gallery fabrics as well and they are also shown in some of the pics too.  i promise to show you  more of that line later but i thought they could easily be used amongst each other and both have a very fun womanly vibe to them.


fall quilt market is just around the corner and even though i'm not going i'm still going to show my love folks.  and no,  before you ask i ain't paid to wear this rockin' shirt! i wear it cause i love art gallery fabrics and i'm a proud gang member to a company that inspires creativity and encourages bloggers like me to design, express ourselves fully and have fun with our creative process at the same time.  it's fresh, exciting and a joy to work with them.  i also love having the opportunity to show all of you  some of the new lines.  i know i LOVE seeing other bloggers post about their favorite up and coming fabric lines and it's one of the main ways i find new and fresh fabric designs and designers. and in light of an..ahem..interesting discussion i saw raised today i would like to just say to you guys that you know that i'm honest and up front.  if i don't like a line i won't post about it. bottom line.  i only write about what i truly love and want to use.  i also buy 95% of the fabric you see on this blog. i even buy art gallery fabrics. yep.  i save my pennies like you wouldn't believe to buy a majority of the fabrics i love and show you on here.

so as i recoup and get my GIANT "starring you" post done for tomorrow for the finale of the summer sweater kal i hope this post might get ya to grab your needles and knit or put on some downton abbey and dream up some new projects to sew using splendor 1920!

what new line are you excited for?  are you all inspired by downton abbey?  do you love that some new feminine lines are coming out allowing us to embrace this side of ourselves but also stay current too?  let's chat!

spur of the moment


i've been staring dreamily at my fabric stash these last few weeks wishing i had more time to sew. sometimes i think i spend more time on the computer talking about sewing than i do actually sewing. anyone else ever have one of those surreal moments?  sometimes i chat about it all so much that i feel like i did sew that day.  it's weird.  i'm hoping to change that though :)

i've been laying low the last week battling a horrible cold and it's really knocked me on my butt.  i think it was a sign that i need to sew more...lol.  for real.  it was a sign that i got off balance again.  i lost that teeny bit of equilibrium i had found for about a minute the other month and got off track.  i've had so many projects in the works that involved tons of design and computer time that my knitting and sewing time has gone to the wayside. i know i need to make a change and i'm grateful that this time i caught myself getting off track now instead of in the xmas craziness..lol.  that's a scary place that xmas crafting mania...lol.  this year i vow to go into it differently.

i also know there has been a ton of giveaways on here lately which was sort of accidental.  too many awesome prizes that i thought you would all LOVE and not enough weeks in the month.  but i think once a week is just too much for this gal.  so i'm taming it back to every other week or so to leave more room for me to just....well....be me on here.  a girls gotta just write her thoughts now and then ya know?

i'm really excited about a lot of the upcoming projects i'm working on and hope that somewhere in the next few weeks that the creating vs computer time balance evens out a bit more again and that my kleenex finally wins the battle against my runny nose.


i finally got to work on my washi dress as well. finally.  big sigh.  i luuuuuurrrrve it! like really love it.  i love it so much that i stayed up very, very late in the worst part of my cold with tissue shoved up my nostrils so blowing my nose would not slow down or hinder my sewing process...muahaha...seriously.  honesty runs rampant here...run now if it's too much for you..haha...i won't judge you.  the visual is awesome i know...and don't think i don't know you'd all do it too.  if you were sick and you truly were a die hard sewer you would so plug your nostrils with kleenex so you could get your sew on. yes you would...lol.

i also love the washi so much i drove the almost finished dress over to my folks house and tried it on for them (can we say die hard sewer?) just to...ya know....love the washi some more. i can't wait to show you all the bust darts!  i was proud of those darts.  no nipple points or wonky seams.  i took my time and they are purdy.  same with that neckline. ohhhh rae...the topstitching...i love it!  so fun!  but the most exciting news...i didn't need to do a full bust adjustment!  yessssssss!  i did make an xl though.  fits like a dream.  and no.  i'm not embarrassed at all to admit i made the xl.  this mommas got some boobies and is proud of it...muahahaha.  i figured i'd rather go for the xl then do a FBA.  staying away from that one till i have to.  i just need to hem and finish the armholes and i'm wearing that bad boy.
i got some awesome sewing time in on sunday during our modern sewing group as well and went full on spur of the moment sewing and made a whole quilt top and back!!! woot woot!  it was great fun.  i just went for it.  put the pedal to the metal and sewed that bad boy.  mind you it was a fast sew and super easy but i really wanted to have a go at some free motion quilting and wanted to do something modern and fun.

so now comes the batting.  problem is i'm out of batting.  i need some recommendations from you fellow quilters.  do any of you order your batting online?  do you have a favorite brand and kind of batting?  is the shipping tons if you order it?  help???  i want to quilt this bad boy like yesterday. super excited about it.  i'm even thinking of doing up a quick tutorial for it so you can all make one too if you dig it which i hope ya do :)

let's chat creative time ladies.  have any of you been out of sorts with your creative balance?  what are you working on? how do you try to maintain your equilibrium? 

Sweetheart Dress Sewing Pattern Release!!!!

BUY  NOW
i'm so excited to tell you all that the sweetheart dress pattern is finally up for sale!!! yay!!!! writing the sweetheart dress pattern has been a true labor of love for me.  i adore it and hope you all will too.

a retro & modern dress featuring an adorable heart cutout on the back that your child is sure to adore! with a flattering silhouette that showcases your fave fabric crush and special feminine details The sweetheart dress is sure to be a showstopper!  the pdf sewing pattern is sized for 2T - 6T and i can't wait to see the wonderful and lovely dresses you are all going to make!
 

the sweetheart dress pattern features:

: : digitally drafted & professionally graded pattern pieces for the bodice & heart cutout

: : 18 page full color pdf pattern complete with clear & easy to understand step by step instructions with bright photos and digitally drafted diagrams

: : pattern pieces for sizes 2T, 3T, 4T, 5T & 6T

: : instructions for a professionally finished garment featuring a tutorial for a feminine, hand sewn button loop and also a fully lined bodice (with no hand sewing! woot woot!).

: : size charts, fabric requirements, notions, and sewing tips/glossary to ensure a great fit

: : a fun sewing experience :)

the sweetheart dress pattern is available for purchase at the following:


.....MORE SHOPS COMING SOON!

i would like to give a huge giant thank you to lauren dahl of the awesome new biz "selvage designs" for her endless patience, input and grading skills. she seriously saved me from going bonkers.  you rock lauren and i couldn't have got this done without you.  lauren recently launched selvage designs where she offers creative and technical services for independent pattern designers.  she does grading, tech editing, pattern digitization, diagrams/illustrations and more!  she's amazing! be sure to check her out!
you can find more selvage designs below:


and also a big hug and thanks to all my lovely pattern testers! they were hard core this bunch and i think the pattern is all the better for it!  thanks ladies!  i'll be showing off some of their handiwork and cute blogs in the next few days!
modern bear orange from camp modern and bobbers from camp sur coming november 2012 from birch fabrics
i hope you all enjoy the pattern and have fun with it!  we love our sweetheart dresses in our house and i'm looking forward to having some fun with different prints and layering for the fall/winter weather!  i soooo appreciate all of your support and honestly, it means so very much to me to be able to do what i love.  so thanks in advance to all of you lovelies who purchase the pattern and who have shown me so much support to get this pattern released over the last few months.  xoxoxo


what do you think? you guys excited?  i hope so :)  i get so happy just thinking about all the little sweetheart dresses running around out there!  hope you all had a wonderful weekend!  fill me in on how you are :)

giveaway winners!


the winner of the violette field threads paper pattern collection giveaway is......

commenter #7 - luciana


the winner of the indie fat quarter bundle giveaway by pat bravo for art gallery fabrics is.......

commenter #21 - mindy

congratulations ladies!  i'll be in touch with you soon.  thanks so much for all of your entries and also to our wonderful sponsors art gallery fabrics and violette field threads

you can find more art gallery fabrics here:


and  you can find more violette field threads here:


Indie Project Bag Pattern & an Art Gallery Fabrics Giveaway!

Yay! It's fat quarter gang day today!  It's my turn up for a project this week for Art Gallery Fabrics! I'm sharing my newest tutorial the INDIE Project Bag Pattern


Anyone who knows me knows that I always have tons of projects on the go.  I never go anywhere without at least one knitting/sewing project.  Along with my projects I always have my trusty journals to write and sketch more ideas in.  I even keep a journal beside the bed for ideas like the INDIE Bag when they pop into my head in the middle of the night.


The INDIE  Project Bag came to me late one night when I was laying in bed having trouble sleeping. Sometimes when I can't sleep I think about sewing or knitting and the methodology soothes me.  I was thinking of all the projects I have on the go and trying to schedule in my mind when I was going to get them all done.  I realized that in order to make it easier for me to transport a lot of my projects at one time to my weekly knit nights or meetings for upcoming projects I would need a bigger project bag.  Not just any project bag though. A simple tote just wasn't cutting it for me anymore. I wanted one with some attitude.  A bit of modern, a hint of retro and of course, some quilting goodness.

I knew I was going to be using Pat's new line Indie and I had been daydreaming that day about how much I loved the line.  All of a sudden visions of the dashes and angles from two of my fave prints in Indie popped into my head and the design of the INDIE project bag was born.  It's fun to make, a great project to practice your quilting/topstitching skills and just think of all the fabric and color combos you could use!!


indieprojectbagpattern.jpg

Want to here/see more about the INDIE project bag and make one with me? 

Pop on over to Art Gallery Fabrics for more yummy pics and a fancy PDF download with pattern pieces! 

But don't forget!  One of you is going to be a lucky winner of a fat quarter bundle of Indie by Pat Bravo for Art Gallery Fabrics!! Seriously one of my fave collections of the year. Yay!!!!  Here's the deets:

 THE PRIZE  - one lucky winner will win a fat quarter bundle of Indie by Pat Bravo for Art Gallery Fabrics.

HOW TO ENTER  - leave a comment to let us know when you have done any (or all) of the following:

-follow us and Art Gallery Fabrics on your fav social media platform

(Pinterest, Facebook, Twitter) and Subscribe to the Art Gallery blog to stay up to date on all thing AGF & the Fat Quarter Gang..ohhh..and lets not forget Flickr!

THE RULES  - you must leave a valid email address in your comment or you will be disqualified.

- giveaway is open until September 28th, 2012.

Good luck, have fun and happy sewing!


creating...


life has been crazy the last 2 weeks.  school is now in full swing for my girlie and she's loving it!  the hubs finished his giant 3 day exam and we are slowly starting to learn how to breathe and be a bit more of a normal family again.  we've all had to adjust to a new morning routine and an evening one.  it's exciting to see mackenzie loving school and to have my hubby home at night with no studying to be seen.  it's great!


i've been a busy, busy bee.  i've been working really hard on the sidelines trying to get the sweetheart dress pattern out to you guys asap.  i'm gearing for next week ladies!  yeehaw!!!!  i'm excited to have my first sewing garment pattern for sale!  the dress will be sized for 2T - 6years!!!  yay!!!  i'm just working on the final edits/diagrams and photos, and finishing up the pattern testing.  let me tell you though....it's been a long and tiring process and i think i will be happy to move on to all the other fun new projects waiting so patiently in the sidelines for me. 

like these....

1. bella by lotta jansdotter 2. field study by anna maria horner
some lotta jansdotter love.  i think these piles will both be quilts someday when i have time to quilt again...lol.

1.  from indie by pat bravo for art gallery fabrics 2. fine feathered in pomengranate from field study by anna maria horner
these 2 prints are going to be my washi dress and washi tunic!  i picked them and the rest of my "field study" bundle from a great bundle sale the other week from our sponsor fabricworm.  i couldn't resist the sale...lol.  to say i love the fabric is an understatement.  the unicorn is there care of harper.  she thought it upped the wow factor on my photo and i agree because the washi dress seems like a mystical creature i keep longing to meet that i haven't had a chance to find yet.  oh to have 48 hrs in a day....soon rae...soon....the washi will be in my wardrobe rotation.  the top print is afro fusion dusk from "indie" by pat bravo for art gallery fabrics and it's one of my favorite prints from that line. it's going to be a washi tunic that matches perfectly with my jeans & leggings.  that other to die for feather print is "fine feathered in pomengranate" from field study by anna maria horner. looooovvve it and cannot wait to wear this with my fave pair of boots for fall.

rock 'n romance by pat bravo for art gallery fabrics
i also have been busy dreaming up a quilt block and quilt layout for my amazing gorgeous and drool worth line "rock 'n romance" by pat bravo for art gallery fabrics.  i am loooooooving this line.  seriously.  i keep taking it out and petting it over and over.  as soon as i received it i started sketching like a mad woman....hopefully i will have some pics for you guys of the block in progress soon.  i hope to sneak in some sewing time on it this weekend.  for now...i just keep sketching..lol.

rock 'n romance by pat bravo for art gallery fabrics
gorgeous right?!  so many projects could be made with any of these prints!

 modern bear orange from camp modern by birch fabrics (coming november 2012) lining is bobbers from camp sur
btw...how cute is this bear print?!!!  this is "modern bear orange" from camp modern by birch fabrics it's 100% organic and i'm obsessed with it (both camp sur and camp modern are set to release in november 2012). i have a really bad phobia of bears in real life so to sew with them instead is kind of bringing me some peace in a weird way. i'm always having nightmares about them. darn bears.  that's what i get for growing up with them in my backyard all the time.  even though i'm in a city now i still think they will find me.  i've had way too many face to face encounters with the furry beasts for my liking.  stay tuned for more pics of this dress and for the sweetheart dress pattern release!  i can't wait! 

i love seeing other people's fabric purchases and stash so if you've treated yourself recently share a pic!  link up your blog post or pics!  let's see what you've been inspired by lately!  it's time to get creating ladies.  sip that coffee and let's chat fabric love!

p.s. i'm taking tomorrow off peeps.  i'll see you all on monday!  i've got friends visiting in town and a sister about to have a baby so it's sure to be a good weekend.  hope yours is wonderful too <3

p.p.s don't forget to enter to our giveaway to win a prize worth almost $100 from voilette field threads!  who wouldn't want the whole collection of their paper patterns! awesome!

Violette Field Threads Paper Pattern Collection Giveaway!

ok....get ready.  this giveaway is drool worthy. seriously.  so jealous! one of my fave online pattern shops (and sponsor) "violette field threads" has a great prize for you all today!  the creation of two best friends, violette field threads is a dreamy, beautiful and wonderful place to find sewing patterns to dress that special little girl in your life! 
emmaline
 at violette field threads you can find both paper patterns and pdf patterns for items ranging from dresses, skirts & pants to tops and hair accessories!  there literally is enough to make a whole wardrobe!  a gorgeous couture one at that!  the sizing at violette field threads is awesome too!  most patterns range from size 2T - 10!!!! WOW!!!!!!!!!!!!!! how's that for maximum usage out of one pattern! you could make one every year!

1. stella  2. vivienne 3. molly 4. chloe
violette field threads patterns and tutorials also include over 40 full color photos to guide you through each step by step instruction.  the photos are bright and clear and the instructions are suitable for the beginner to advanced sewer.  if you're looking to up your sewing skills this is a great way to learn!  you'll end up with some lovely garments with very professional results.

ginger
ready to hear what the prize is?  want to know why i'm drooling?
 

| THE PRIZE |
- that's right!!!! the winner will win the entire collection of paper patterns & tutorials from violette field threads!!!! that's an almost $100 value people!!!!!!!!!!!!!!!!!!!!!!  what a prize!!! thanks ericka & jessica!

|  HOW TO ENTER  | 
 - simply pop over to violette field threads and take a look around.  come back and leave me a comment telling me which paper pattern you would make first if you won!
- bonus entry!  like violette field threads and/or luvinthemommyhood on facebook and leave a seperate comment telling us you did that too.

| THE RULES  |
- giveaway is open until monday, sept. 24th, 2012, midnight, pacific standard time. - you must leave a valid email address in your comment or you will be disqualified.

whitney
and while you are over at violette field threads be sure to check out the newest of their fall releases!!!! so awesome!  i'm dying to make the whitney pants (above) and josephine dress (below) for harper! so adorable!
josephine dress
good luck everyone and happy sewing!!!!!!  a big thank you again to the gals at violette field threads for such an awesome giveaway! you can find all things violette field threads below:


Book Review: How to Make Stuffed Animals

how to make stuffed animals by: sian keegan
i recently got the opportunity to review a new book called "how to make stuffed animals: modern, simple patterns + instructions for 18 projects" by sian keegan.  i jumped at the chance.  i mean in all seriousness how cute is this book!  for real.  it's adorable.  it oozes awesomeness.  we all know that normally stuffed animal books are cute, that's a given, but this one is special.  it's modern, clean and the patterns all reflect sian's style as well.  she both illustrated and wrote the book.


the book layout and design speaks for itself.  the illustrations throughout the book and for the patterns themselves are such a great touch and help to carry that modern aesthetic throughout the book.  i literally squealed when i got the book and opened it up and saw the page above.  love.  simple as that.


the book contains 18 fun projects that are simple to make but yield really professional results.  they are all animals and vary from dachshunds, cats, lambs all the way to penguins and grizzly bears.  there's an animal in there for everyone :)

all the projects in this book can be completed with about 1/4 yard of fabric.  hello!  fat quarters! yee haw!  i love when i can find some fun projects to use fat quarters with! that means these projects are modern, simple and fun to make and also don't cost alot!!! woot woot!


sian also shows you throughout the book in both the photography styling and the projects themselves that these stuffed animals can also be used for other things besides just a toy.  They can be used as a cake topper, hanging mobile and even an ornament!  Heck they would look awesome just on a cute shelf in your craft room even! 


sian also has a whole chapter in the book just on "things to know before you make your animals".  it covers materials, techniques, sewing, stuffing and hand stitches. 


i highly recommend this book for anyone looking to have a go at making stuffed animals.  i can't wait to whip one of these up.  i'm thinking they would be great little xmas pressies for the girls or even just for myself :) 

you can read more about sian keegan at the links below. if you pop over check out her stuffed plants! they are amazing!!!  happy stuffie sewing everyone!


do any of you love making stuffed animals?  are you a sucker for a handmade toy?  which animal would you make first?  are you as excited as i am to see some modern patterns for stuffed animals?  c'mon...let's chat :)

Skye Reve Fabric Giveaway!!!!

image source: skye reve fabrics
**this giveaway is now closed. thank you for all of your entries.**
one of the first places i ever ordered fabrics online from was skye reve fabrics.  i was just starting to learn to sew and was new to the whole wide world of sewing.  i remember natasha being so kind to me on etsy and also being really helpful with great customer service.  ever since then i've used a lot of different online shops but skye reve fabrics always stuck out.  i'm so happy to have natasha as a sponser here now on luvinthemommyhood.  if you haven't already heard of skye reve fabrics you should definitely check out natasha's shop.  it's always jam packed with the newest and freshest fabrics and today you'll all get a chance to win some of them!!!!
1. medium chevrons bundle 2. nautical map in pink 3. floral apron in lemon 4. out to sea bundle
that's right!!!! it's time for a fabric giveaway!!!!!!!!!!!!!! yesssssssssssssssss!!!! i get so excited over these. honestly. you'd think i was entering myself...haha.  i've already gone over to the shop and picked out which lines i would choose from.  i thought i would show you all my current faves from natasha's awesome selection in case you needed a little bit of inspiration when filling your cart..wink wink...lol.  ready to go shopping with me?  let's go drool over some fat quarter and half yard bundles! grab your starbucks and let's roll gals!
1. medium dots bundle 2. aqua cupcakes  3. simple floral in aqua
skye reve fabrics has affordable and reliable shipping options and all fabrics are shipped within 3 business days!  if you're canadian like me you'll be happy to see that her canadian rates are low compared to other competitive shops.  she also ships internationally as well.  skye reve also has a great collection of online sewing patterns that feature PDF pattern tiered pricing for even more savings!  So the more you buy the more you save!

ahoy there fat quarter bundle by sarah jane
1.  anchors away in gray 2. pinwheel in lemon  3. cake mix in spring
skye reve fabrics was named after natasha's (a freelance fashion designer) two daughters middle names "skye" and "reve".  how cute are those names! love them!  natasha has been so sweet to offer up a great prize for you all today.  want to know what you could win? here's the deets:

  |  THE PRIZE  |
- one lucky winner will win a $40 gift certificate to skye reve fabrics!!!! woot woot!!!!! time for some fabric shopping ladies!!! thank you natasha for such a great & generous prize.

|  HOW TO ENTER  |
- simply visit skye reve fabrics and pick out what you would use your gift certificate on and then come back and leave me a comment telling me what you would buy.
- *bonus entry:  like skye reve fabrics facebook page and then come back and tell me you did that too in another comment.

|  THE RULES  |
- giveaway is open until monday, sept. 17, 2012, midnight, pacific standard time.
- you must leave a valid email address in your comment or you will be disqualified.


good luck everyone and thanks again natasha for the awesome giveaway! you can find all things skye reve fabrics here:

HAPPY SEWING & SHOPPING!

Petitie Kids Boutique Pattern Giveaway!

maia dress: 12mth-8yrs
it's back to school time and we've got a great giveaway for you all today.  petite kids boutique is offering up a lovely choice of fun patterns from her shop.  petite kids has everything from skirts to dresses and shorts.  all perfect for building that lovely handmade wardrobe for your wee one.

haven dress: 6mth-12yrs
petite kids boutique patterns are simple to follow and include clear, colored images.  you will find that most patterns are sized for 12M-8T and some even go as low as 6mths!  wowsa!  sew up a few!  i love it when i find sewing patterns that can grow with my child so you're not left only being able to make it once.  wong's patterns also feature step-by-step guides on making things like the fabric flowers or other accessories shown on the garment like the sasha jumper dress shown below. 

sasha jumper dress: 12mth-8t
i really love that petite kids boutique patterns also allow your fabric choice to stand out!  you all know how i love my fabrics and wong's patterns allow you to let those gorgeous prints shine along with the garment itself.  you can choose from retro to classic styles and all are fun and comfortable for your child to wear.  there are also patterns for all skill levels from beginner to advanced.  wong also even allows small quantities of your garment to be sold as well!  so if you're an etsy shop seller or someone looking to sell some adorable handmade goods at craft fairs this fall these would be an excellent choice.
you ready to find out what you can win?  yay!

THE PRIZE:
- a bundle of any 3 patterns you would like from "petite kids boutique"! thanks wong!

HOW TO ENTER:
- visit petite kids boutique and then come back and tell me which 3 patterns you would choose if you won.
- *bonus entry: like luvinthemommyhood and/or petite kids boutique on facebook and then come back and leave me another comment letting me know you did that.

THE RULES:
- giveaway is open until wed, sept. 12, 2012, midnight, pacific standard time.
- you must leave a valid email address in your comment or you will be disqualified.
thanks for the giveaway wong and good luck to everyone! you can find petite kids boutique on facebook here and their etsy shop here.  happy sewing!!!

My Best Friend Series - Guest Post on Sew Together

Poppy the Pfaff and I
I was so excited when Maryanne and Caroline asked me to be part of their fun new series "my best friend" where they have invited guests to come on and chat about their sewing "best friends"! Can be a what or a who.  Such a great idea!  When it came time to write my post I had originally intended to talk about the people in my life who have had a huge influence on me when it came to sewing but I just kept coming back to one of my fave things in life - my sewing machine Poppy.  Yep, that's right.  She's got a name.  Poppy the Pfaff is one of my best buds.  I spend all my spare time with her, tell her all my secrets, cry with her, laugh with her, cheer with her, get angry at her, and just plain love the buckets outta her.  She's my sewing machine.


Wanna know more?  Pop on over to "Sew Together" and check out my whole post about Poppy and I's relationship and my tumultuous journey before I met her.   

So...who/what is your best sewing friend? An indispensable tool? A machine like me? A family member or friend? C'mon...join in! it's fun!

P.S. I'm taking the day off on Monday for the long weekend :)  I hope you all have a wonderful and relaxing long weekend and I'll see you on Tuesday <3

Simpatico Pillow Tutorial & Baby Pressies


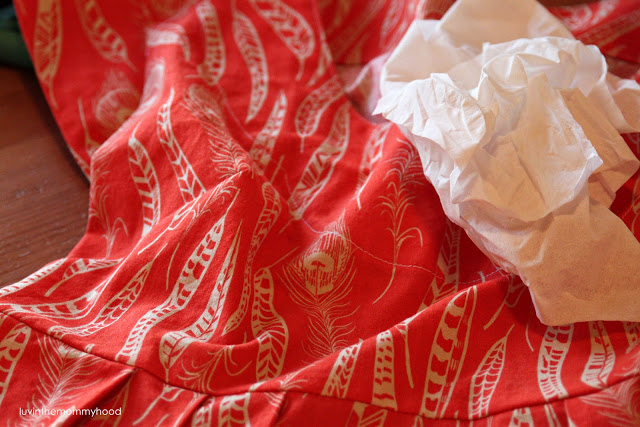
my baby sister is about to have her first baby any day now and for her baby shower pressie i decided to make the baby a duvet cover along with a matching pillow using one of my fave lines of the year "simpatico".  i also made her a boobie pillow.  yes, i call it a boobie pillow...that's what it is so lovingly referred to in our home...lmao.  anyone else call it that?? if not - you should :p  I'm determined to start a new trend.

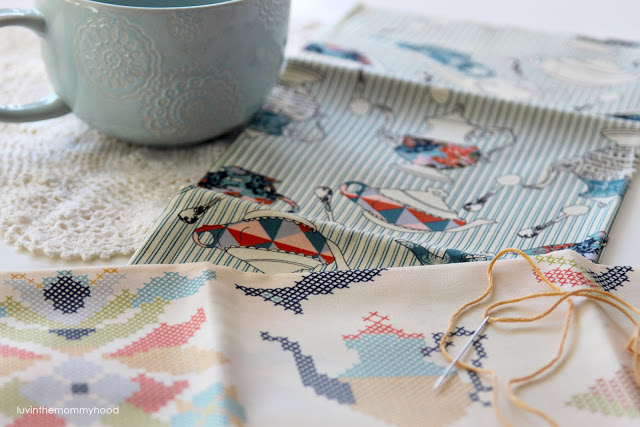
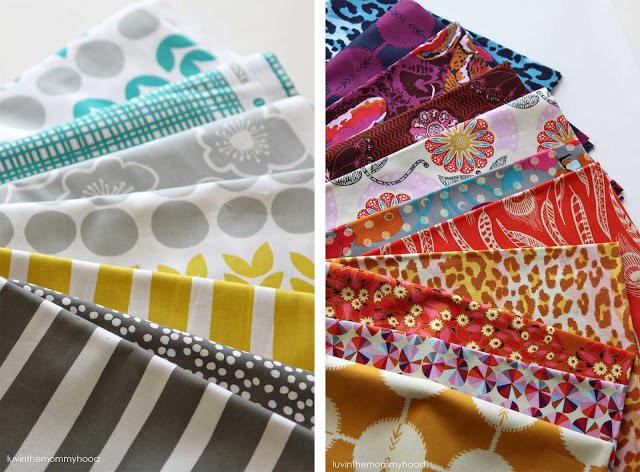
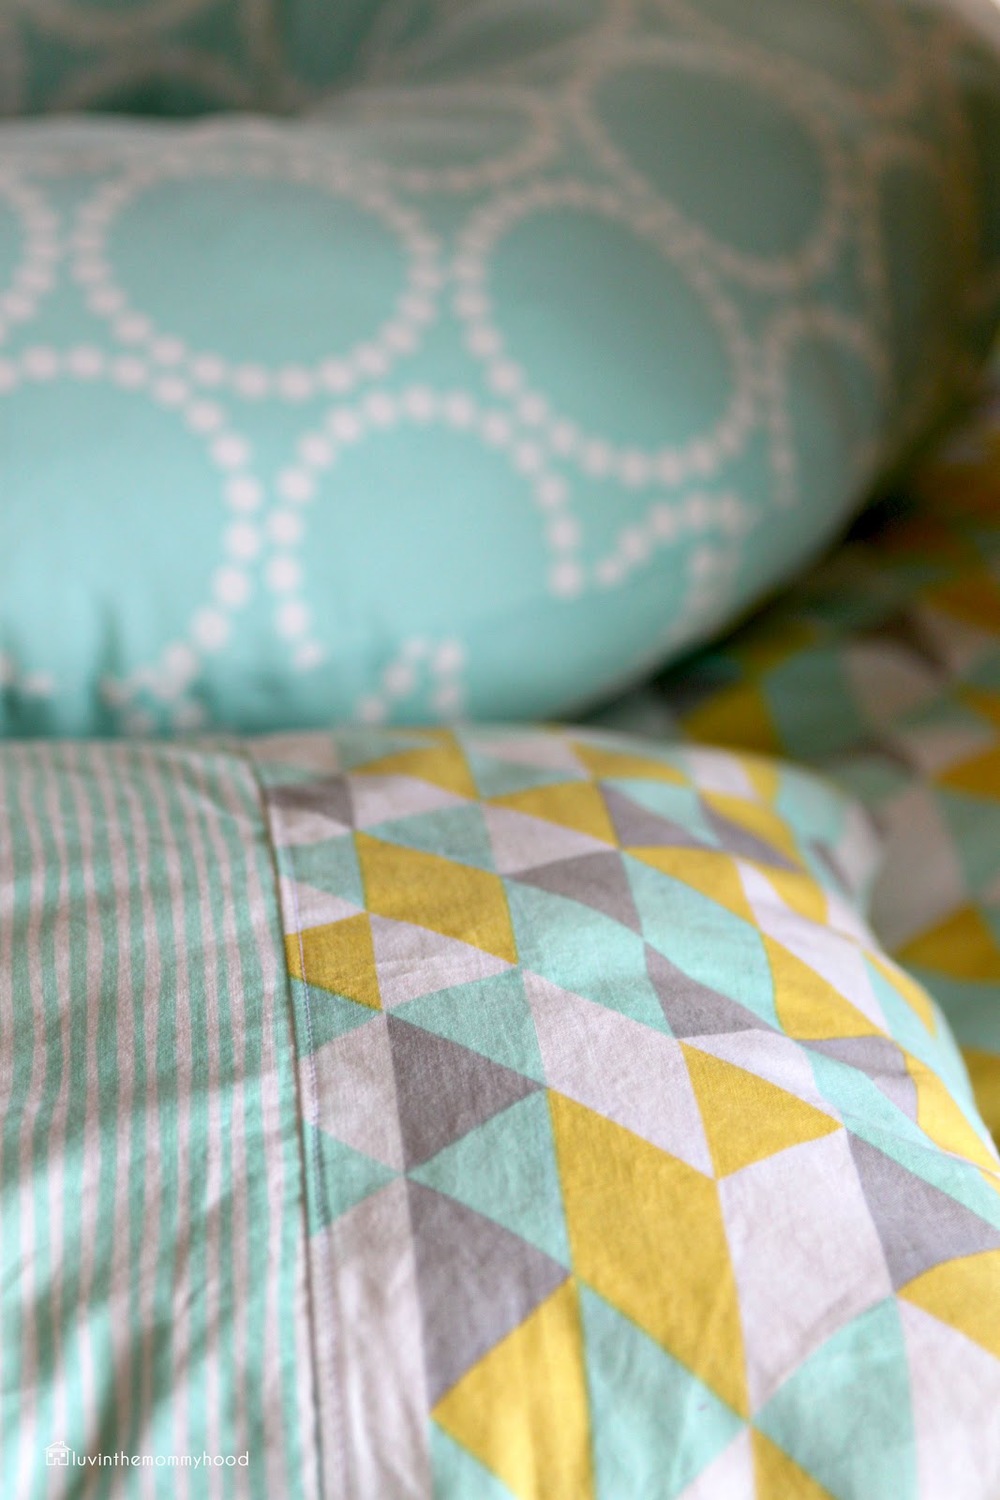
on point and straws in colorway minty from simpatico by cloud 9 fabrics
i was over the moon when i spotted that the new line "simpatico" from cloud 9 fabrics was being released a few months ago and my sister and i had been anxiously awaiting it's arrival ever since so i could make the baby's bedding.  we knew the colors and print would be perfect for her nursery.  after making the pressies for her i'm now dying to do my own bedding with simpatico.  such a fabulous line of fabrics and oh so soft. cloud 9 fabrics are all organic and i swear this baby is going to be sleeping and eating in style :)  i'm a tad bit envious of it actually..lol.  we used the  prints "straw" and "on point" bedding in colorway minty for the bedding.

pearl bracelet in turquoise from outfoxed by lizzy house
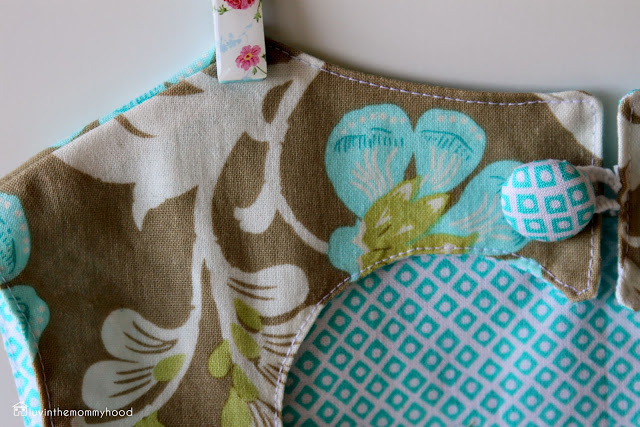
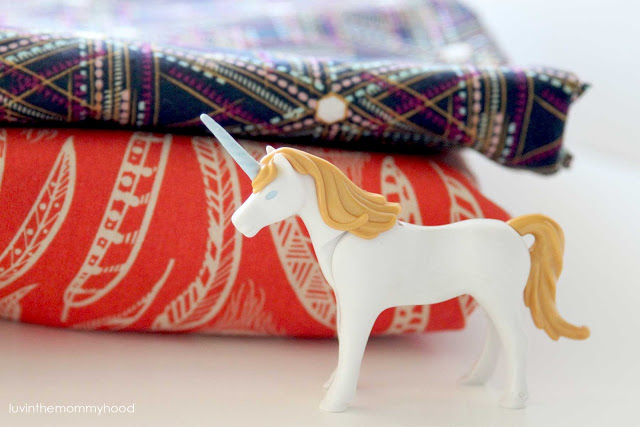
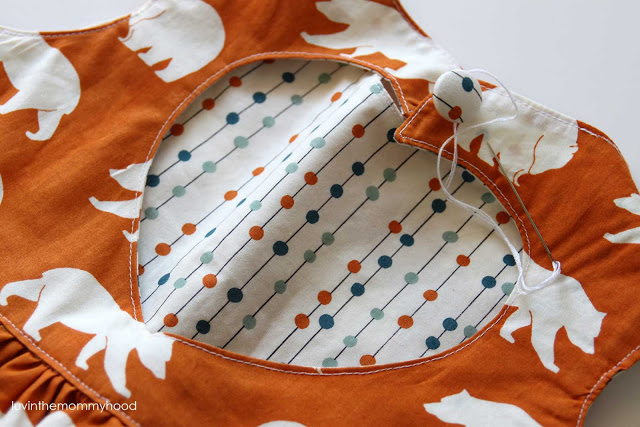
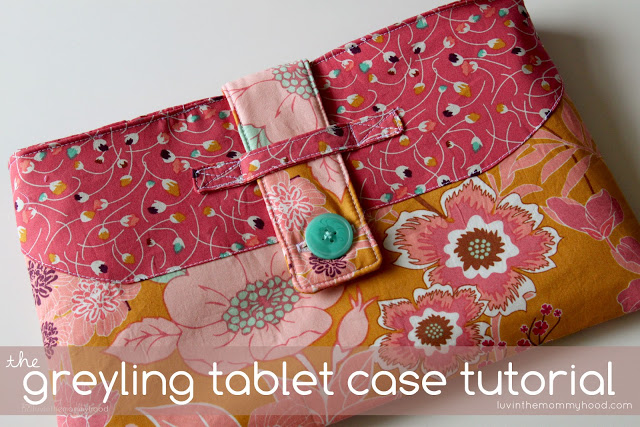
for the duvet cover i simply did a zip closure on one end so she could pull it on and off for easy washing.  i made the booby pillow out of one of my fave prints - 
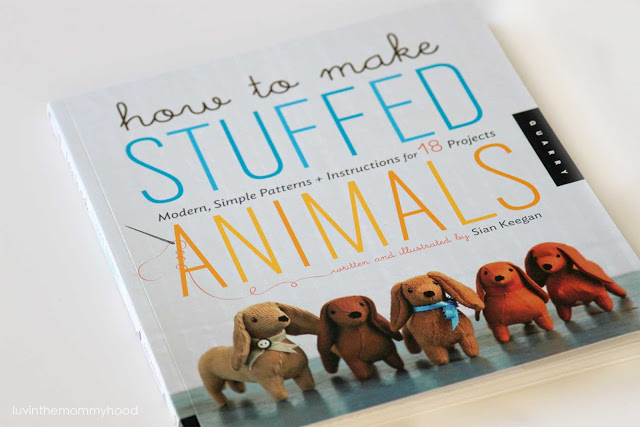
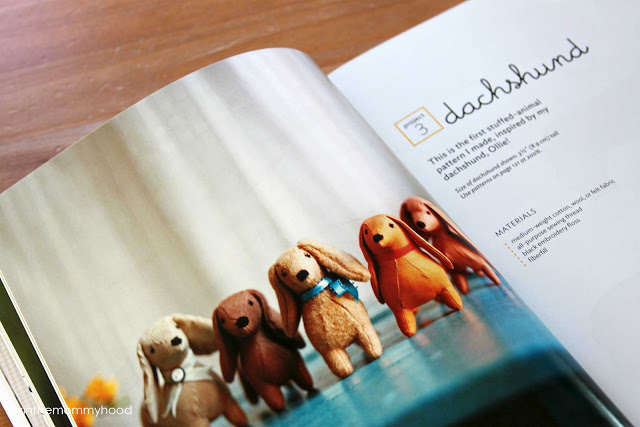
pearl bracelet in turquoise from the line "outfoxed" by lizzy house.  i can never have enough pearl bracelet in my house.  love it!  i used the pattern from lotta jansdotter's book "simple sewing for babies" to make the actual booby pillow.  this book is one of my all time faves and i use it constantly for baby gifts. i highly recommend it.


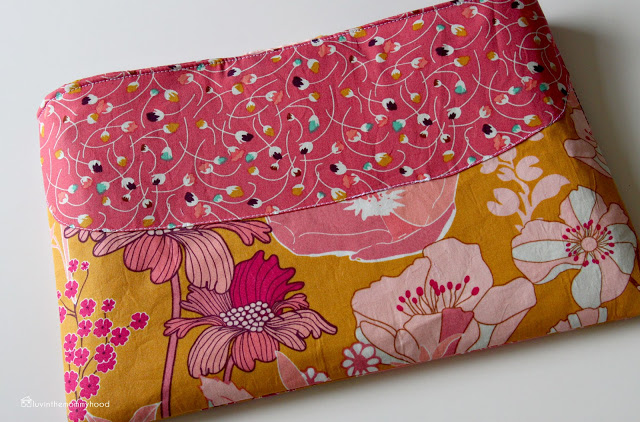
since my sister leans toward very simple and minimal designs for her fabrics the duvet cover was "on point " for the front and "straws" for the backing.  when she said i could surprise her with the pillow i have to admit it was hard for me.  i wanted to go nuts with this fabric and have some fun with it but i had to reign myself in and try to stay true to my taste but also hers as well.  i think i pulled off a happy balance.  it has a pop of fun on the front but it's still clean and simple.  i love it and thought you might all love it too.

i know a lot of you are just learning how to piece things and to customize things for your home and your clothing.  this is a fun little tutorial showing you how to piece your pillow front together based on the size of your pillow.  easy for customization and fun on style.  it's a quick sew and finishes really nicely with a few little touches.

SIMPATICO PILLOW TUTORIAL

Copyright 2012 www.luvinthemommyhood.com  All rights reserved.  For personal use only unless prior permission has been given.
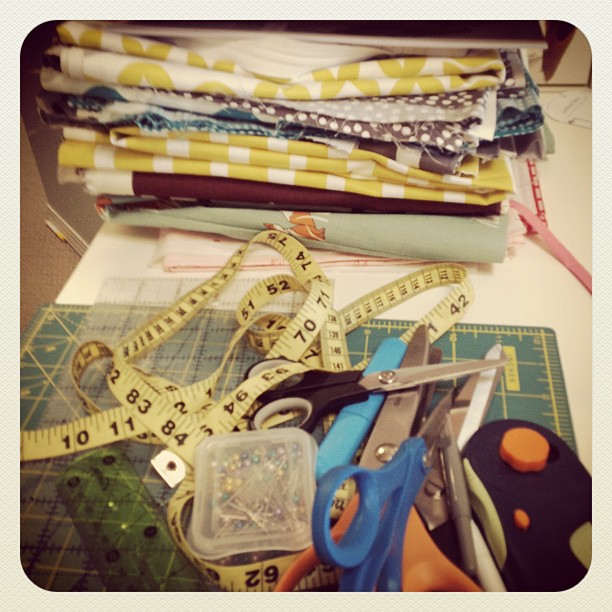
| MATERIALS |

- (1) piece of fabric (I used quilting cotton but you could use any type of light-med-home dec weight you would like) for the back of pillowcase the size of your pillow form + 1/2" for your seam allowance for your height and width.  My pillow form was 16" x 16" so I cut my back 16 1/2" x 16 1/2".
- (2) pieces of fabric for the outer columns of your front pillow case.  My pillow form was 16" x 16" so I cut my pieces to  6 1/4"W x 16 1/2"H to accommodate for seam allowances.
- (1) piece of fabric for the center column of your front pillow case cut to 5"W x 16 1/2"H
When you front piece is assembled your center strip will measure 4 1/2"W and your two outer strips will measure 6"W.
 - Scissors or rotary cutter/mat
- Co-ordinating thread
- Hand sewing needle
- Pillow form
- *Optional: light to medium weight interfacing if desired.

*How to calculate your measurements for a different sized pillow form:

The formula for calculating your measurements for a different sized pillow case would be to start by  taking your pillow form size which would be "A" and add you seam allowances to it which would be "B" and "C".  So:

A + B + C = D  so for my pillow my calculation was 16" + 1/4" + 1/4" = 16 1/2"  So my D (my overall width) is 16 1/2".

Next decide how wide you would like your finished columns to be keeping in my mind that they  have to equal your calculation for D when sewn.  My columns were to be 2 @ 6"W and 1 @ 4 1/2"W.

Now you have add your seam allowances again for the assembly of your front.  Your wider columns will be called "E", and your seam allowance "F".  To calculate how wide to cut your wider columns.  We would use the following calculation:

E + F= G so mine was 6" + 1/4"= 6 1/4"  This is how wide our outer columns will be.

To calculate our middle column you would simply take your desired finished width and add your seam allowance.  So "H" is your column and "I" & "J" are your seam allowances.

H + I + J = K so mine was 4 1/2" + 1/4" + 1/4" = 5".  I would cut my center column to be 5" wide.

Now let's check our math....

6 1/4" x 6 1/4" + 5" = 17 1/2"

which means once we sew those strips together with 1/4" seam allowances your total width would equal 16 1/2"! Yay! We did it!  You can  now apply this to any pillow form and also play around with it and have some fun.  You could easily add another column or change your widths around.
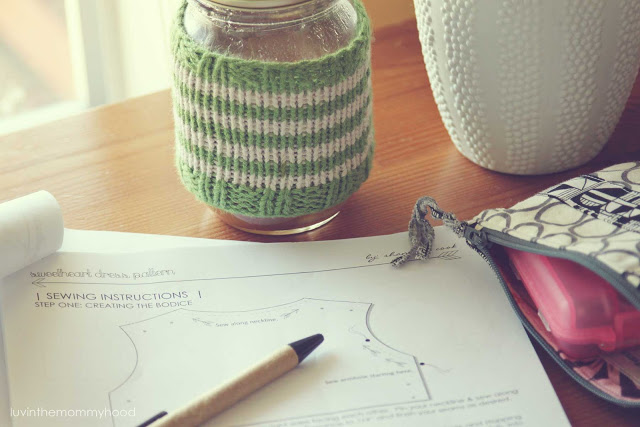

| INSTRUCTIONS|

STEP ONE: ASSEMBLE YOUR PIECES

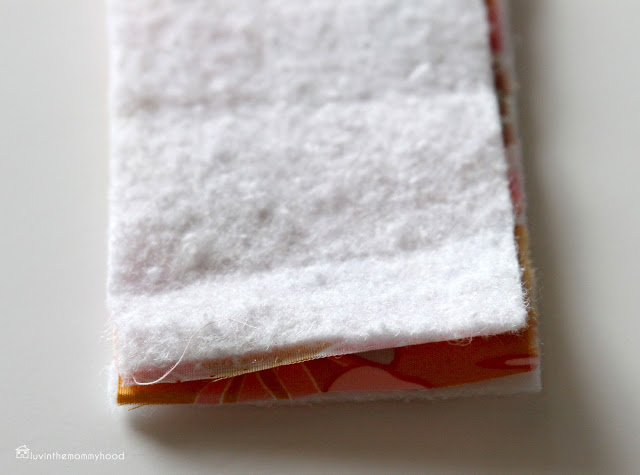
Cut and prep your fabric pieces.  If you would like a sturdier feel to your pillow & you are using quilting cotton feel free to use a light-medium weight interfacing on your fabrics for the pillow.  If you are using a medium/home dec weight you should be fine.  I used a quilting cotton and did not interface it as it was for bedding and I wanted a very soft drape for mine instead of your normal throw pillow.

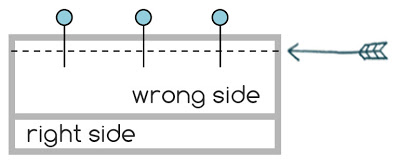
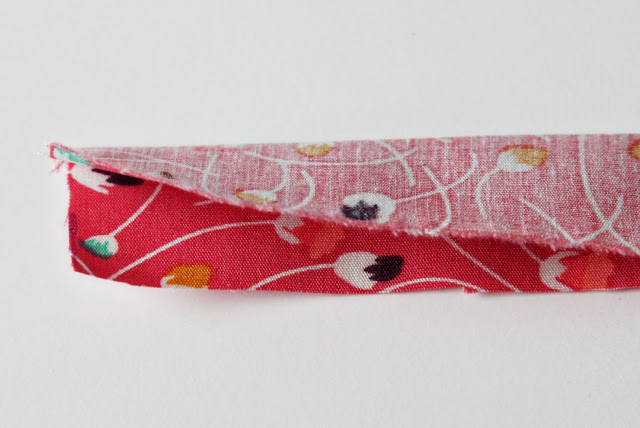
Place your center strip right sides facing each other onto one of your side strips with the long edges matched up.  Stitch along your long edge with a 1/4" seam allowance.  *See diagram above.  If you aren't using a serger finish your seam off by either zig zag stitching your seam or trimming with pinking shears.  Press your seam allowance towards the darker color.  Now place the other long edge of your center strip right sides facing each other onto your other side strip lining up your long edges. Stitch along your long edge with a 1/4" seam allowance.  Finish this seam off as well.  Press your seam allowance towards the darker color.

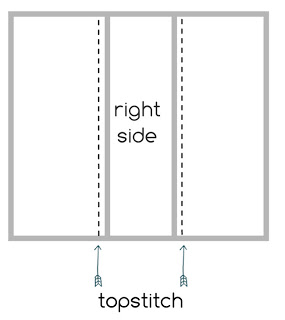
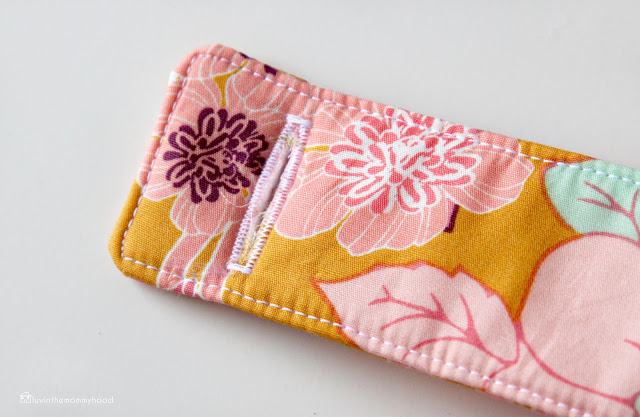
With your pillow front right side facing up edgestitch down the outer long edge of your center strip as close to your seam as possible.  Press for a nice clean finish. *See diagram above.


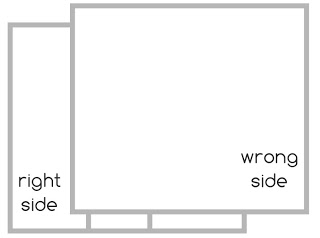
Now place your front and back pillow pieces together, right sides facing each other.  *
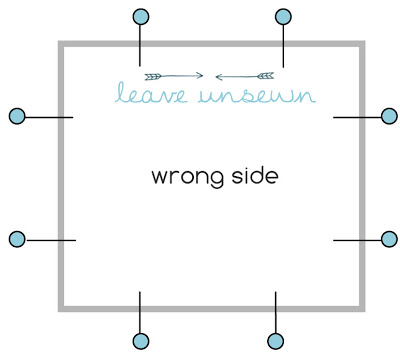
See diagram above. Pin around your entire pillow making sure to also mark where to leave yourself a 6"+ opening to put your pillow form in.  Sew along all 4 sides (but not closing your marked opening) with a 1/4" seam allowance.  *See diagram below. Finish off your seam allowances and trim your corners. 


Turn your pillowcase right side out.  Put your pillow form inside your pillow case and hand stitch your opening closed with an invisible stitch.  You're done! Great job!!!

There are lots of options for closures here as well.  You could easily add in a zipper closure if you wanted as well.  I originally intended to have a zipper closure but didn't have the right size left in my stash :(  Luckily my sister's pillow form is easily washable and she can throw the whole pillow in the wash.


HAPPY SEWING! Be sure to add your Simpatico Pillows to our Flickr Group here! I'd love to see what you make!!!  Feel free to email me at luvinthemommyhood@yahoo.ca if you have any questions.

what's your favorite baby pressie to make?  have any of you made any projects with simpatico?  Aare you a lizzy house addict as well? let's chat ladies! it's monday and i've got sewing on the brain...lol.

wiksten tanks and rocky coast cardis


i've been way behind on my fo shots lately.  i decided to try to get a few snaps of my rocky coast cardigan that i finished eons ago and also a newly sewn wiksten tank. *edited to add: can you believe i took these first 2 shots by balancing my camera on my ample cleavage? how's that for putting "the girls" to good use...muahah!


the wiksten tank is tank #2.  i made  my first one with fabric i wouldn't be sad to use if it didn't work out and i liked how it turned out but only wear it with a cardi because i definitely suffer from the side boob peekaboo and a way too big back neck opening.  not a good fit.  thankfully my lovely friend rae (from made by rae) had a tiny bit of the same issue with her neck and i took her cue with my 2nd attempt and took about 1" or so off the top half of the pattern along the folded edge when you lay out your pattern piece before cutting.  you can see how rae did it here.  the tank fits like a dream now (or at least i think so) and it's been in very heavy rotation ever since i finished it last week.  covers all my wobbly bits but isn't so loose and baggy that it makes me look preggers. 

1. wiksten tank in cotton lawn 2. rocky coast cardigan by hannah fettig in quince & co. lark in colorway frost
please excuse the very windy shots...we were right beside a very windy ocean just before sunset and i was right in the line of fire for ocean winds.  i swear this tank drapes nicely..lol.  the fabric is a cotton lawn i got on sale for a good deal.  like a $4.98/yd kinda deal :)  i also picked up two diff voile's to see how i liked the tank in them and also to make a wiksten tova tunic for the fall.  i can't wait to sew those bad boys up.


i've also been anxiously awaiting the mail carrier each day (what else is new right?!) for a yummy order from fabricworm that i placed to make a washi dress and tunic for myself.  so excited!  i decided after a year of selfish knitting it was time to do some selfish sewing.  this momma needs some new clothes and i'm so excited to make some new lovelies that i can fit just for my body shape.  fun!!!


after all...i need some purdy things to wear with my rocky coast cardigan this fall.  thought you were gonna see my badly sunburned nose didn't ya...nope....i hid that bad boy.  i didn't want to scare you and your children..lol.


i love this cardigan so much.  it's easy to wear, super comfy and oh so warm and is the loveliest shade of grey.  it's gorgeous.  the yarn is quince and co. lark in colorway frost and it's one of my fave yarns to knit with.  so yummy and squishy!  a big thank you again to my parents who spoiled me rotten with the yarn for this cardi for xmas last year!  best pressie!


see those cables?  aren't they mesmerizing?  i really enjoyed the outcome of this pattern even though i made a colossal boo boo 3/4 of the way through my back that had me ripping all the way back to my armholes!!! EEEEEEK! i cried real tears over that one.  luckily the cables are a fun knit and go quite quickly.  this cardi makes me want to live right beside the ocean. i can see myself strolling the beach each night and sitting on my cozy deck knitting with a yummy cup of tea.  it's that kind of cardi folks.  but even though i don't live right next to the ocean i can still get the ocean quite easily.  so when the hubs suggested we go down and check out the sunset last night i knew i had to get some shots of the rocky coast cardigan in it's home - the coast.  doesn't it look purdy?


yep, this is why we live where we live.  gorgeous and breathtaking views every single day.  can't beat that.  it just inspires you to create so much more.  unfortunately the kidlets didn't enjoy the view and the cold breeze as much as the hubs and i did...lol.


we did manage to get some pretty shots and the hubby (who loves outdoor/landscape photography) got some gorgeous ones of the sunset.  you can never have too many pictures of breathtaking sunsets and sunrises.  at least that's what we think in our wee house.  reminds me to stop and breathe ya know?  life gets busy and crazy and little things become way more important than they need to be and when i'm standing next to the ocean watching something so breathtaking the world just seems to stand still.  i feel like i can breathe and all my worries disappear for just that brief moment.  i'm so glad my hubby loves them just as much as i do.  he will sniff out a sunset pic no matter where we are and on more days than not i wake up to his tales of sunrise shots he took and it's just the way i like it.


what projects have you all finished lately?  are you any of you planning do start doing any selfish sewing/knitting?  have you made a wiksten tank or a washi dress yet? c'mon ladies...chit chat....my coffee cup is lonely and could use the company :)

Fat Quarter Shop Giveaway - Bella by Lotta Jansdotter!!!


to say that i am excited about today's giveaway is an understatement.  i bit the bullet and pre-ordered yardage of bella by the amazingly talented lotta jansdotter a few weeks ago and have been stalking my mailbox ever since.  it was simply a no brainer.  i'm a HUGE fan of hers and loved her previous line echo.  i decided that you all should have some bella too! my awesome sponsor fat quarter shop has generously offered up some of this gorgeous new line for a giveaway today! thank you fat quarter shop <3

images via lotta jansdotter
if you are new to the world of lotta jansdotter go check out her work.  she's got books, fabrics, papergoods and more. the talents of lotta have no end.  i always find myself anxiously awaiting to see what she is going to do next.  i'm hopelessly addicted to the color palette and the natural, modern & organic designs she comes up with.  just popping over to her website gets me inspired and antsy to sew and draw.  i think that is my favorite thing about lotta's work.  i want to create when i see her work.  it's not intimidating or overwhelming...just simply inspiring.  there's a freedom to imagine and just simply make when i look at her work.  it's addicting and i love that i can let my mind wander and go on a little journey when playing with her fabrics.  if you're interested in lotta and how she works and designs check out these two posts that i found interesting here and here.


the new line bella doesn't disappoint either.  with fresh colors, a touch of whimsy and some great  new staples i will definitely be using this collection in everything.  i had a very, very hard time deciding what color and what prints to order first. i wish i could have bought the whole line in yardage but this momma is on a budget peeps :P  i can easily see these prints lending themselves from quilts, home decor to clothing.  it's going to be so fun to play with them!  and i can't wait for you to play with them too!  are you ready to see what you could win?? yay!

images via lotta jansdotter
THE PRIZE
- one lucky winner will receive a layer cake (42 - 10" x 10" squares) of the new fabric line "bella" by lotta jansdotter from fat quarter shop. wahoo!!!

HOW TO ENTER
- simply leave a comment below telling me what you would make if you won the layer cake of bella.
- bonus entry* follow luvinthemommyhood and/or fat quarter shop on facebook and leave a seperate comment telling me you did that too.

THE RULES
- you must leave a valid email address in your comment or you will be disqualified.
- giveaway ends august 27th, 2012 at midnight (PST).

good luck everyone and happy sewing!!!!! a big thank you to fat quarter shop for the awesome giveaway and for having such a wonderful & inspiring shop! head on over to the fat quarter shop and show them some love ladies!  you can find all things fat quarter shop here:


weekend wishes


this weekend i'm wishing that i get to see some of your lovely faces at fibrations fibre festival on sunday!  i've been busy working away on my little half table.  that's right! eeeee!  i'm going to be selling goodies & patterns at fibrations.  i thought it would be fun to be a vendor there and besides my sewing & knitting patterns i really wanted to have some fun accessories for knitters & sewers for sale.  i've got totes & reversible totes, sock knitting project bags (and jumbo ones too), plus commuter cowls & my fave - needlebooks! 


so if you are in victoria or in the mood for a day trip on vancouver island come swing by fibrations.  it's held in the gorgeous orchard of st.anne's academy on sunday, august 19th from 10am - 4pm.  hope to see you there!!!

you can find more info about fibrations below:

blog  |  facebook

wishing you all a yummy, sunny, fun, fibre filled kinda weekend!  have you ever sold at a market before?  any tips you'd love to share to help us newbies out?  i'd love to hear them!

p.s. don't forget to get your entry in for the amazing lunden designs & birch organic fabrics giveaway!!!  this is a prize you don't want to miss!!!

Lunden Designs Sewing Patterns & Birch Organic Fabrics Giveaway!!!


a few weeks ago i spotted the new quilt patterns from melissa of lunden designs sewing patterns.  i fell instantly in love.  what can i say?  curves, curves, curves and of course, birch fabrics!  a win/win in my book people!


you all know i'm a huge fan of birch organic fabrics (the patterns were inspired by them) and i adore sewing curves.  so when melissa generously offered up a chance for me to review her newest patterns & for you to win them i, of course, willingly obliged. hello....how could i say no right?...lol.


i mean look at this quilt?  it's been fixated in my mind for weeks.  i kept staring at it on my pinterest board and drooling over that yummy block.  i looooove it.  i can definitely see this quilt, which is called "star gazer", being made in our house sooner than later.


but let's not forget "by sea or by land" either!  i adore this one as well!  both quilts are fun, modern and great for showcasing your fave fabric lines.  both of melissa's patterns are suitable for anyone looking to try out a quilt with curves so don't be scared.  it really is easier than you think it is and melissa walks you through each step.


lunden designs sewing patterns are very clear, well written and include full size pattern pieces and diagrams/illustrations along with each pattern.  she explains each step in a way that makes it accessible and easy to follow as well as includes helpful tips and hints to make the process as simple as possible.
lunden designs quilt patterns
the construction is fun & creative for each quilt.  i can't wait to try them both out!  both of these patterns use the lovely 100% organic fabrics from birch organic fabric and were inspired by them.  i've had the pleasure of sewing with these fabrics more than a few times and they have a lovely hand and are a super soft.  a perfect combination for a gorgeous quilt!  the modern, retro & whimsical designs that birch organic fabric is known for pair well with melissa's fabulous quilt patterns.

are you ready to find out what you could win?  yay!  so excited!

1. storyboek two 2. scamper
 *this giveaway is now closed*
THE PRIZE

- one lucky winner will receive a copy of "star gazer" and "by sea or by land" quilt patterns as well as the following fabrics:

* six - 1/4  yards of storyboek II prints (either in boy or girl colorway) from birch organic fabric
* nine - 1/3 yards of scamper prints from birch organic fabric

wowsa!!!! what an awesome prize!!!! someone is gonna be one lucky winner! thank you melissa & cynthia!

HOW TO ENTER

- simply leave me a comment below telling me which quilt pattern of lunden designs sewing patterns you would make first.
- *bonus entry: follow luvinthemommyhood and/or birch fabrics on facebook and come back and leave a separate comment telling me you did so.

THE RULES

- you must leave a valid email in your comment or you will be disqualified.
- giveaway is open until august 20, 2012, midnight PST.


you can find more on birch fabrics and lunden designs below:


good luck everyone!  i cannot wait to see who wins!  a big thank you as well to melissa of lunden designs and also to cynthia of birch organic fabric for the generous and awesome prizes!

The Greyling Tablet Case Tutorial


it was my lovely pal mandy's (of sugar & candy handbags) birthday a few weeks ago and i knew i wanted to spoil her.  i posted the business card holder i made her but i also made her another pressie - a handmade tablet case for her new tablet.  woot woot!  mandy is a whiz when it comes to making her gorgeous handbags for her business so i knew i wanted this tablet case to have a purse like feel to it. a mandy vibe so to speak.  i even named it after her.  her maiden name is greyling - thus the "greyling tablet case tutorial" was born.


mandy has a great eye and a flare for prints and i knew she had been eying my pat bravo stash of summerlove for art gallery fabrics. i used "naivety berry" for the upper curved portion (the faux flap) and "beyond bliss ginger" for the main body print. the tablet case has a tab closure that buttons on the front with a curved faux flap.  it's interfaced and padded so it will keep those trusty tablets safe and cozy :)

this tutorial is a great one for practicing your buttonholes, curves and edgestitching skills.  you guys know how addicted i am to topstitching right?  well i just can't get enough.  it's like drawing to me and i love the intricacy of it.  it adds that special touch to just about any and everything if you ask me :)  and a turquoise button never hurt anyone right??


you ready to make one for your tablet or ipad?  let's get sewing!!!

THE GREYLING TABLET CASE TUTORIAL

*Copyright 2012 www.luvinthemommyhood.com All rights reserved.  This tutorial is for PERSONAL USE ONLY.  Please do not sell items made with this tutorial unless permission has been given.  Thank you.

MATERIALS

**Important: Please note the dimensions used for this tablet match a Samsung Galaxy Tablet that is sized 10"H x 7"Wx .3799"D.  In order to calculate the dimensions for other tablets please measure the size of your tablet as accurately as possible or refer to your product's website for specific dimensions.  I added 3" to the tablet height (that actually is your cases width) and 2" to the width (that becomes your cases height) to accommodate for the depth of the tablet and also for the batting/interfacing that you will be using.  The tablet slides into the case sideways so your width actually becomes your cases height and the tablet height becomes the cases width when cutting your fabrics. This is not a perfect science.  I strongly suggest adding the seam allowances that will work best for the fabric and tablet that you are using.

* Outer Fabric Bottom Portion - (2) pieces @ 13"W x 9"H
* Outer Fabric Upper Portion - (2) pieces @ 13"W x 4 1/4"H (to cut pattern piece out of)
* Lining Fabric - (2) pieces @ 13"W x 9"H
* Interfacing (medium to heavy weight) - (2) pieces @ 13"W x 9"H
* Batting - (2) pieces @ 13"W x 9"H for lining and
   (2) pieces 6.5"H x 2.25"W for tab.           
* Loop (lining fabric) - (1) pieces @  4.75"W x 2"H
* Tab (outer fabric) - (2) pieces @  6.5"H x 2.25"W
* Coordinating thread
* Scissors or rotary cutter/mat
* (1) Button

PATTERN PIECES

- Pattern piece for the curved faux flap (upper portion) of case.

TABLET CASE FAUX FLAP PATTERN PIECE - DOWNLOAD HERE
*Please set your printer to "no scaling" or "actual size" before printing your pattern piece.

INSTRUCTIONS


*All seam allowances are 1/2" unless otherwise noted.

STEP ONE: ASSEMBLE YOUR OUTER FABRIC

Print out your Faux Flap Pattern Piece.  With your lining fabric cut out out your pattern piece and press.  Take your (2) Outer Fabric Upper Portions and press well a 1/4" seam around bottom curved edge.  This can be a tad tricky but just take your time, go slow and press well.  I'm a bit of a perfectionist so I pinned mine down as I ironed. See images below.  Note: There are other ways to attach the faux flap but for time, style and materials on hand this was the way I chose to assemble my case.


With (1) of your Outer Fabric Bottom Pieces right side facing up pin an Outer Fabric Upper Piece right side facing up matching both long straight upper edges together.  I removed my pins that were on the wrong side of the fabric as I pinned to the Bottom Piece. Edgestitch along the curved edge as close to the outer edge of your curved piece as possible.  Press flat.  See images below. Repeat with the other Outer Fabric Upper & Bottom Pieces.  Take both of your Outer Pieces and iron your interfacing onto the backs of both pieces. You now have two tablet case outer pieces.


STEP TWO: MAKE YOUR TAB AND LOOP

Match your two pieces of batting for your tab with your two tab pieces.  We're now going to sew together your tab and make a bit of a sandwich so to speak.  Lay your pieces together in this order:  batting, fabric right side up, fabric right side down, batting.  Basically your fabrics will be right sides facing each other and the batting pieces will go above and below them.  See images below.


Sew 3 sides (both long and one short) using a 1/4" seam allowance leaving one short end unsewn.  Clip your corners taking care not to cut through your sewing.  Turn right side out and press.  Edgestitch along perimeter of the tab except for your unsewn short end.  Press again.  See image below.  Nice work! 


Now we are going to make your loop.  Take your loop piece and press in half matching both long sides together.  See image below.


You are going to sew using a 1/4" seam allowance starting at one short end all along one long edge ending on the other short end but leaving an opening big enough to pull your loop through along the long edge.  See image below.  Mine was about an inch wide.  Trim your corners being careful not to clip your stitching.


Turn your loop right side out.  Press flat and edgestitch around the entire perimeter of your loop taking care to close the opening you used to pull your loop through.  Remember, go slow and steady and you'll do great!!!  Grab one of your Outer Case Pieces and turn right side up and find the center of your case. Mark this with your fabric marker.  Measure about 1 - 1 1/2" up from the bottom of your faux flap and mark again with your fabric marker.  Now find the center of your loop and mark it as well.  Place and pin your loop down matching the center of your loop with the center of your case where you marked your 1 1/2" measurement.


Starting on the left side of your loop sew a box about 1" wide.  Now stitch an "x" through it.  Repeat for the right side.  This will keep your loop attached and look purdy.  See diagram above.  Now take both your Outer Case Pieces and place them right sides facing each other.  Pin along 3 edges leaving your long top edge unpinned.  Sew along your 2 short sides and the one long bottom edge with a 1/2" seam allowance.  Clip your corners. Turn right side out and press. *Note: this would also be a great time to add a label to your case if you are using one.


Next find the center point of your case on the side without the loop attached.  Mark with your fabric marker.  Now find and mark the center of your tab.  Match these up and place a pin at least 1" down from the top edge with your nice side of your tab facing down and pointing towards the bottom of your case.  This will keep your tab from moving and shifting around while you assemble your case.  See diagram above.

STEP THREE: ASSEMBLE YOUR LINING

Place both of your Lining Pieces right sides facing each other.  Then place your batting on both sides of your fabric pieces sort of sandwiching them together just like you did when you made your tab.  So you will have: batting, lining right side facing down, lining right side facing up, batting.  See images below.  Pin along 3 edges leaving your top edge unpinned.


Sew along your 2 short sides and the one long bottom edge with a 1/2" seam allowance.  Clip your corners and trim your batting accordingly.

STEP FOUR: ASSEMBLE YOUR CASE

Ready to put your case together? Yay!  Grab your Outer Case and turn it right side out.  Now with your Inner Case still inside out simply put the Outer Case inside of the Inner Case.  Trust me, it sounds trickier than it is.  Just put one inside the other. It really is that easy.  When looking at it you will see the wrong side of the Inner Case and the wrong side of the Outer Case.  See image below.


Pin around the entire top perimeter of the case.  Sew along the top edge with a 1/2" seam allowance making sure to leave at least a 3-4" opening to pull your case through.  Turn your case right side out being careful not to poke yourself with your pin that is holding your tab in place.  You will now have what you see in the image below.  Press your case.  Now push your lining pieces inside the outer pieces.  Before we finish please try the tablet out to see if it fits.  If you need to make adjustments to it now is the time. 


If your sizing is all good press down your case again especially around your top edges.  Topstitch your entire perimeter down taking care to close up the opening you used to pull your case through.  Press again.  Looking good!!!! 


STEP FIVE: MAKE YOUR BUTTONHOLE & ATTACH BUTTON

We now get to put those buttonhole making skills to work :)  Don't be scared - you can do it.  Place your tablet inside your case if possible and grab your tab and pull it under your loop.  Mark with your fabric marker where you would like to have that perfect button on your tab.  Now following your machines instructions make your buttonhole where you marked.  Remember to always, always do a test for your buttonhole.  Trust me on that one.  I used to be scared of buttonholes but now find them a joy to make (if you need more help making a buttonhole please see this post).


Once you are done your buttonhole pull your tab through your loop again with your tablet in your case.  Mark with your fabric marker exactly where your button should be stitched on to match up perfectly with your new buttonhole.  Hand sew your button on being careful to only go through your outer fabric - not your lining as well. 


You're done!!!! Looks awesome!!!! Your tablet is going to be riding in style!!! So fun!  This case would be great to showcase some of your fave prints or go with bold solids instead!  Even a faux leather would look awesome!  Experiment...try out different combos and have some fun!


thanks for sewing with me!  be sure to add your greyling tablet case to our flickr group! i love seeing your projects when they are done! if you have any questions about this tutorial please feel free to email me at luvinthemommyhood@yahoo.ca.

love the fabrics i used?  you can find all things pat bravo & art gallery fabrics here:


zephyr sundress - kids romper revamp craftsy class review part deux


my little one was a feeling a tad better today so we had an impromptu photo shoot of her new zephyr sundress from figgy's patterns.  i'm smitten with this whole dress and seriously would love to be able to wear this myself.  mackenzie is absolutely over the moon with it.  the print i used is pat bravo's retro harmony sugar from her line summerlove (art gallery fabrics).  it's made with 100% pima cotton and is soooooo soft and has a lovely hand/drape. i knew it would be lovely with this pattern and perfect for the summer weather.  the yoke is natural by harmony art and is a 100% organic cotton sateen from www.stitchsimple.com (where your fabrics come pre-washed and pressed! amazing!).  and those buttons....yes, the buttons....dug deep into my button stash jar for those lovelies and i think they pull the whole dress together.  perfectly purdy!


i think the braided straps and bodice detail are my favorite part of the zephyr pattern.  shelly shows you in detail how to make all of these steps in her "kids romper revamp class" on craftsy.  it was wonderful to sit down and sew the bodice while watching her.  i'm a visual learner so i completed the dress way faster than i would have if i had just read the instructions.  it was also a lot more fun.  the yoke pairs so nicely with the little gathered details of the front and back and really this sundress is a great beginner-intermediate project!  you learn a lot of skills in this one pattern so i highly recommend it for those of you looking to bump up your skill level. 


the only mod i made to the whole pattern was to topstitch the entire yoke.  i believe in the pattern you only edgestitch the bottom of the yoke to close your facings (encase your seams etc.) but that topstitching fiend in my came out and i just had to do it.  i love the feeling of things not moving about after i'm done with something as purdy as this yoke.  i would have had to press it big time every time it came out of the wash to keep it all crisp and lovely so this way it will stay where it's supposed to and be way less high maintenance for this momma. that is just my personal preference though :)

mackenzie chose the length of the dress.  she normally goes for knee length so it was cute to see her ask for it to be more mid calf this time round.  she said she loved it like that so i followed the instructions exactly for my hem.  i even added my little label to it :)


shelly's lesson on measuring and making pattern adjustments was very helpful.  my wee one is a tiny thing so i knew ahead of time that i would have to take the chest in a wee bit.  i ended up tracing the size 4/5 because my wee one was sick and i couldn't measure her properly.  it all worked out fabulously though because all i did was do a 3/4" seam allowance instead of a 1/2" and it fit her perfectly!  good thing my guessing on her strap length worked out too.  it's sure hard to make a dress for your kidlet when they are too ill to move.  i won't do that again...lol.


it did brighten her mood though when she saw it all done.  she couldn't wait to get better so she could wear it.  she hasn't taken it off since.  it's her new fave and if you knew my daughter you would know that is a huge accomplishment.  she's hard to please.  so thank you figgy's for designing clothes my kids will love to wear!  harper is very sad she doesn't have one so it sounds like a size 2 is on the horizon.  i can't wait to see them both out and about running in their zephyr's! so adorbs!


if you would like to take the kids romper revamp class you can for 50% off right now!!!!! yee haw!!! woot woot! seriously though.  i'm not kidding 'round here....that is a mighty fine deal.  that's almost just the cost of the pattern! say what?! yes.....it's a steal of a deal!  for $20 you get the zephyr pattern, all the perks that come with the class (and there are some goodies) and the class - forever!!!!  you can buy your discounted class by clicking on the link below, you know you wanna...
click here for the 50% off kids romper revamp craftsy class


you can find all things shelly and figgy's patterns here:


Figgy's Kids Romper Revamp - Craftsy Class Review

zephyr pattern from figgy's
i love figgy's and i also adore shelly figueroa, one of the masterminds behind figgy's.  figgy's style & effortless designs speak right to my sewing soul :) every time a new pattern comes out i go nutso obsessing over it and i know i'm not alone.  serious sewing eye candy.  the zephyr pattern is one of my favorites.  that darling romper and sundress just make me swoon!
zephyr pattern from figgy
the fact that shelly is doing a class called "kids romper revamp: creative pattern adapting" in combination with craftsy for her zephyr pattern is pretty exciting.  if you're anything like me and sometimes wish the designer could sit down beside you while you're sewing then your wait is over!  with this course you pretty much can!  this pattern has so many lovely details and shelly walks you through them all as well as lots of tips & techniques.  you can take your time, go at your own pace, make notes right on your video and post pics/ask questions all during the class as well.  my favorite thing about having taken a class on craftsy - it's mine forever! that's right.  i can make as many zephyr patterns as i would like with this class....till i'm 90 if i'd like...lol.  and shelly and craftsy even threw in the zephyr sundress pattern with the romper! sweet!!!!

zephyr pattern from figgy's
i set out to make the romper originally but i had promised whichever garment i make next to be for mackenzie and when she saw the romper and the sundress pics she cried for the sundress.  she really, really wanted it so who am i to deny her right? lol!  so sundress it was.  i still watched the entire video for the romper because the techniques are mostly the same and i intend to make harper a romper asap.  i love this pattern. adorable!!!  i only ran into one glitch in my sewing adventures....the pictures.  my poor little girl is sick and can't model for me and i was up very, very late last night taking care of her.  so the pics of my zephyr sundress will hopefully be up sooner than later :)  i'm hoping tomorrow.  but in the meantime here's my lo'down scoop on the "kids romper revamp" class!

kids romper revamp class on crafsty
  what do you get with this class?  awesomeness!!!

honestly!  i was blown away by how well done the video is.  there are so many wonderful functions that come along with the layout/design and functionality of craftsy with this type of instructional video.  shelly is a natural and it's like sewing with a friend.  i learned so many wee tips from shelly, she seriously filled this class with little sewing jewels.  i'm a very visual learner and it was great to follow and sew along with shelly.  she goes over everything and i mean everything about sewing this pattern.  from how to tape your pdf pages together, which needles to use on your machine for what type of fabric, what all the lines and doo dads mean on a pattern page, how to sew the steps & even down to the right techniques & tools to use.  it really was educational and i learned a lot of things that i didn't even know.  well worth the time and i highly recommend it.  

the lessons on how to measure your child accurately and adapt your pattern for the perfect fit were really handy for me - especially for mackenzie.  there is even an adorable measuring chart you get to print out that goes along with your class info.  she even goes over which fabrics to use for what season! hello!!! genius!

the purchase of the kids romper revamp class includes:

+zephyr romper pattern +zephyr sundress pattern
+instructions & diagrams +tips & techniques +supplies & resources

* your class after purchase is available forever (how handy is that!!!)
* clear, bright, professional video.
* ability to take video notes.
* ask questions anytime and during any lesson during your class.
* post your own photos to ask questions/help.
* shelly provides in depth tips & techniques that help to make sewing that much easier and fun.
* class is broken up into lessons so you can easily find/watch exactly what part you are looking for.
* learn more about shelly and her background.
* lessons include videos for:

 + intro  +proper measurements +the zephyr romper & sundress pattern +fabric +interfacing +braiding technique +gathering & main yoke attachment +completing the romper top +romper short pockets +completing the romper +custom options +bonus

what you'll learn:

* make a stylish romper for girls ages 18mths to size 8/9. 
* learn how to adjust the romper for a perfect fit.
* adapt the basic pattern to create four pattern variations from pants to a dress.
* learn tips for adapting the romper for different seasons & fabrics.

zephyr pattern from figgy's
all in all it was a really fun and enjoyable experience.  i would definitely take another craftsy class.  and guess what?  if you would like to take the kids romper revamp class you can for 50% off right now!!!!! yee haw!!! woot woot! seriously though.  i'm not kidding 'round here....that is a mighty fine deal.  that's almost just the cost of the pattern! say what?! yes.....it's a steal of a deal!  for $20 you get the zephyr pattern, all the perks that come with the class (and there are some goodies) and the class - forever!!!!  you can buy your discounted class by clicking on the link below, you know you wanna...

click here for the 50% off kids romper revamp craftsy class

you can find all things shelly and figgy's patterns here:


a special thank you to shelly for being so darn inspirational, sweet and just plain awesome.  also let me just say you made my month when i spotted little ol' luvinthemommyhood mentioned in the supplies & resources section for blogs! i nearly peed myself!!!! you rock girl!

have you all taken a craftsy class before?  did you enjoy it? are you a fan of figgy's? what's your fave pattern? let's chat sewing m'dears! and stay tuned for my zephyr dress!


follow along with the whole tour:
July 31   All Buttoned Up
August 1   Sarah Jane
August 4   Sew Much Ado
August 6   Noodlehead
August 7  Betty Crocker Ass
August 8  Imagine Gnats 
August 9  A Sewing Journal
August 10  Susan Beal
August 11  Such Designs