sewing

SEWING || JOCOLE LADIES SKINNY PANTS PATTERN REVIEW

Jocole Ladies Skinny Pants Pattern Review | VeryShannon.com #sewing #pants

I made myself some skinny pants and I'm so excited!

I'm part of the Jocole Pattern Tour today and when they reached out to me to join in I knew I had to make the fabulous Ladies Skinny Pants! I've been writing on the blog for about 3 years now about how badly I wanted to try my hand at sewing some pants for myself. To be honest - it's frightened me. But just like the zipper, I didn't want it to slow me down or hinder me any longer. It was time to just jump right in! So I did! I'm now addicted! I hate buying pants and they never fit me right so the idea of making pants to fit my body is fabulous!

First let me tell you these pants are so quick and easy to sew!

They are a skinny, pull on pant with a comfy knit waistband with multiple style options (read more about this at the bottom of the post) for the waistband and length. I was shocked at how fast they come together and how easy they are. Jocole patterns are super easy to follow and included tons of information and helpful tips. All the work and time is in the fit. And let me tell you - it's important. I knew I had to do a fit muslin for sure. And boy was mine bad....lol. The first rough sew was HUGE. Like way too big! I went by my hip measurement but it's really tricky for me as my ahem...belly....is my problem area and adds to my hip measurement if that makes sense. So sometimes when I go by that my hips are not in fact that wide - it's just my baby leftovers...lol. So the size I made was giant. So I started by following the fabulous fit tutorials included in the pattern. This is so helpful! There is a link where you can go and see how to make alterations and fit adjustments. I found this helpful as I'm someone who is really visual.

Jocole Ladies Skinny Pants Pattern Review | VeryShannon.com #sewing #pants


I went down about 2 sizes in the hip, 3 in the waist and took my legs down to match a pair of skinny pants I already own. I would guess this was 3-4 sizes down from my hip measurement. The pattern also gives you thigh measurements which is so helpful! I then also made further adjustment to my back seam up near my waist. I had to take in about another 3/4" here as well. Also, when you attach your comfy waistband (yes, there are no zippers in these pants which makes them a great starter pair to sew) I had to take inches off my size for the stretch as well. Overall the fit is ok for these. For my first pair of pants I am satisfied. They are flattering and were fun to make.

Would I make the Ladies Skinny Pants again? For sure! I would definitely make more than 1 more of these. I need 3 - 4 at least! I want to get some nice stretch denim and make some with that. I would also love a black and grey pair too! Really the possibilities are endless with these pants! So easy to customize!

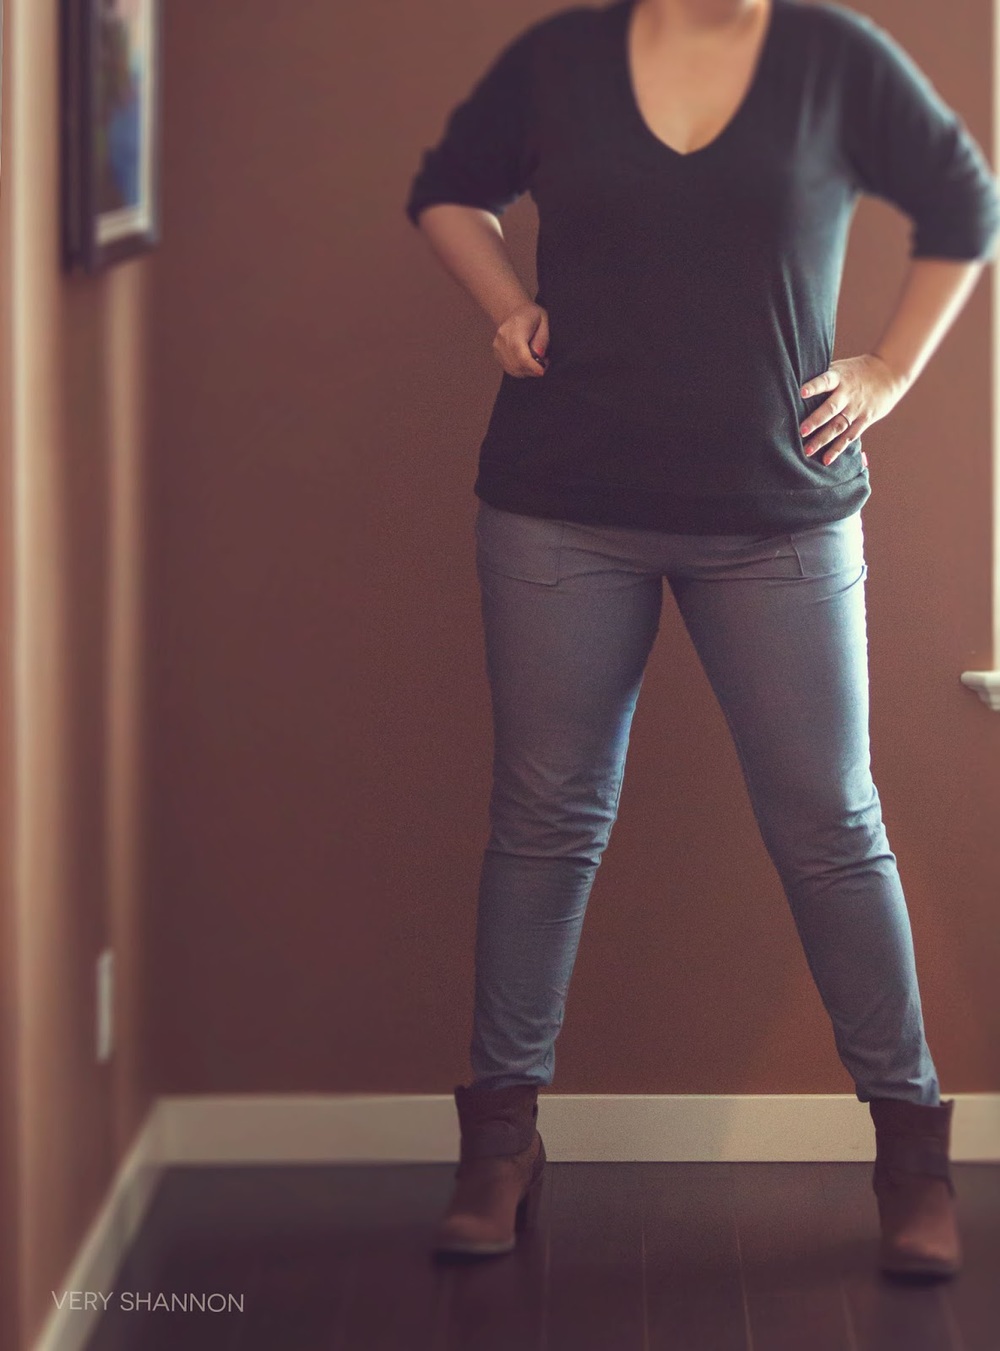
Would I change anything on my next pair? Yes. I made the knee area on my pants too tight. Because I used a chambray from Robert Kaufman (I'm addicted to these) I find I need a bit more room to bend my leg in this area when going up stairs etc. I think I went a bit too aggressive in this area for fit. They look good standing but not when walking.  I would make my waist a bit smaller and definitely make my waistband smaller still. The pants slide down a bit when I'm walking. I definitely had room in the waistband to come in. I also didn't really like the stretch fabric I was using for the waist so I think next time I would change to a sturdier stretch. Mine was a bit too flimsy I think.

What was my favorite thing about this pattern? How easy they are to make! Also, the pockets! I am in love with the front pockets! So fun! I really love topstitching so getting to add details like that to the front and back pocket was super fun to me. My next pair I'm going to do a fun design on my back pockets. For the first time round I kept mine simple with two rows of topstitching as per the pattern and I like that look too. It looks pretty with the chambray! Next time I will add the topstitching on the seam of my pant leg too for a real denim look. I skipped that this time round but now wished I had done it. I also really like the waistband options. So versatile and comfy.

Jocole Ladies Skinny Pants Pattern Review | VeryShannon.com #sewing #pants

After sewing these I'm definitely going to be making more pants for myself!

It was fun, exciting and I learned a ton! The Ladies Skinny Pants are so comfy, flattering to all body types and seriously, they come in Sizes 00 - 28W!!!!! They are also available with 3 different waistband options - skinny, regular, or fold-over (wear yoga waistband up for more coverage and support)! There are also tons of length options! That's right! You can make capris and shorts from this pattern too! There are 7 in total - shorts, bermuda, clam digger, capris, petite full, regular full and tall full! Wow! Plus 2 pocket style options!

I loved all the options and choices to make this pattern work for your needs and figure. My curves are happy! The pattern also includes easy to follow instructions, color photographs & illustrations, and tons of helpful information on sizing and fit as well as sewing! 

So, are you ready to give pants a try to? Or have you made yourself pants before? Have you tried the Ladies Skinny Pants from Jocole? What are your favorite pant sewing tips?


PATTERN | Ladies Skinny Pants from Jocole
FABRIC | Chambray (color denim) from Robert Kaufman
SIZE MADE | Adjusted from multiple sizes on pattern to fit my body
MODIFICATIONS | None other than fit adjustments.
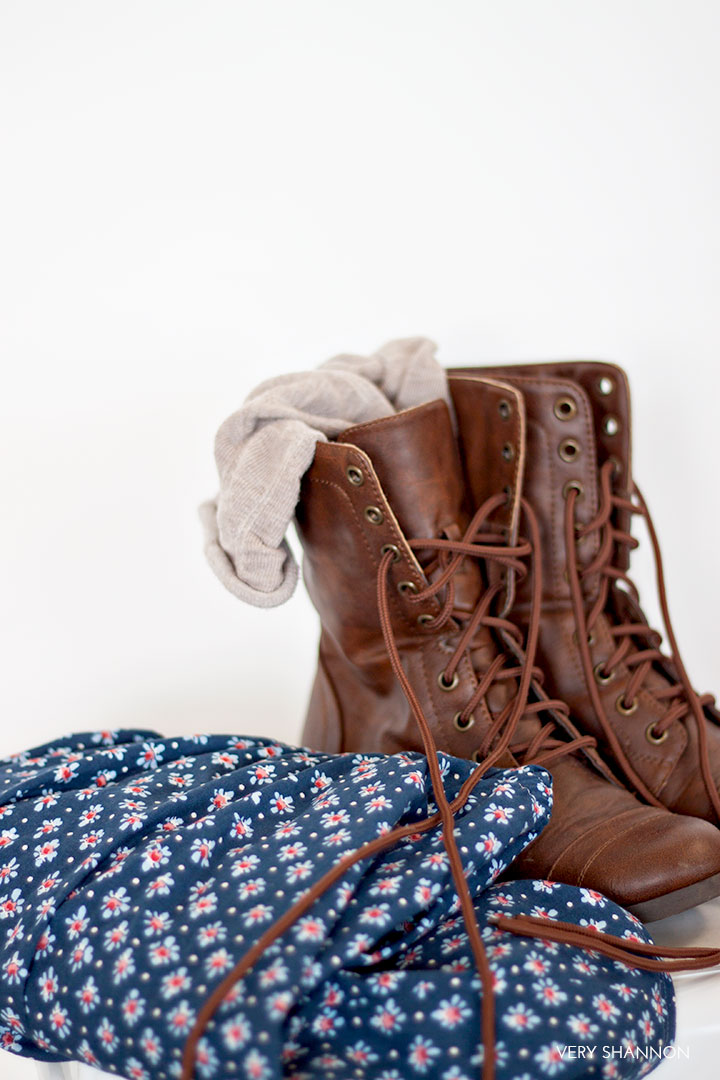
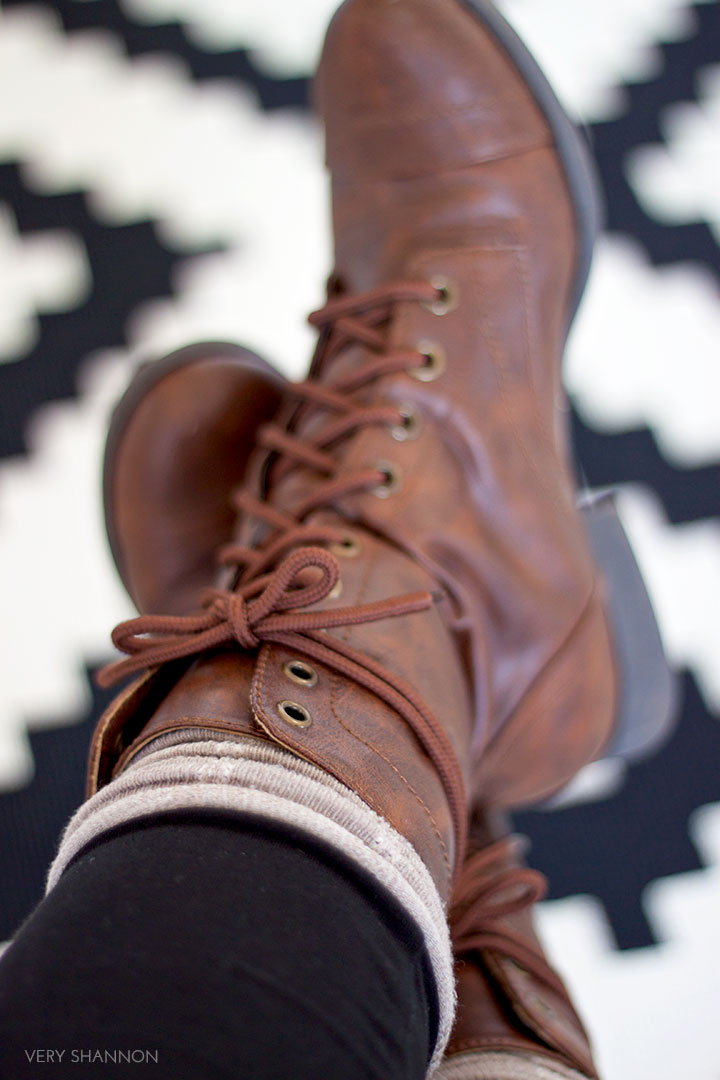
BOOTS | Old Navy
TOP | TNA Pomona T-Shirt from Aritzia in black.

SEWING || COCO DRESS & KEEPING IT REAL

Pattern review of Coco by Tilly and the Buttons || VeryShannon.com

I made a Coco. I made it a few months ago and figured it was about time I got around to taking a pic of it for you guys.

I was in the mood for polka dots and something easy to wear with a little flair. I landed on Coco by Tilly & the Buttons. This dress pattern is versatile, comfy and quick to sew. This one is my wearable muslin. It's not perfect but I'm ok with that. It sort of matches these pics. This is what my children have done to me this week and it was only Monday when these were taken. Bad sleep, bickering sisters, teachers still on strike, my need for a shower (thus the bad hair day)...the list goes on, but then, I'm sure all you mommas can relate. I know I'm not the only one counting down the hours till they go to bed and I can finally take a breath. Bless their hearts I love them but sometimes they drive me nuts..lol.

This left me with pics of me looking bootylicious (I'm not) while staring wistfully at a painting in our dining area or a chair like a weirdo, like what the heck am I doing in these shots? Ones I had to crop my face out of because I looked slightly crazed (remember...don't judge me..lol). Then there is me laughing hysterically as my kiddos make faces at me because they think I'm nuts when I do photoshoots with the remote, which I totally agree with, I do look nuts when I do them. I need to practice more. It's dang hard to take a photoshoot of yourself peeps. The pics below prove it. Especially when you're not photographic and don't photograph well. Plus a girl wants the camera to help you lose 10lbs not gain them. Just keeping it real here folks. So pardon me if I show some pics of my new boots below. Aren't they cute? Some of my favorite boots are from Old Navy so I was happy to give these ones a new home on the weekend. They look a heckuva lot better than I do today.

Pattern review of Coco by Tilly and the Buttons || VeryShannon.com


Pattern review of Coco by Tilly and the Buttons || VeryShannon.com
I feel like when I made this muslin I had one of those situations where I kept making silly mistakes - too much coffee and not enough sleep. That's the excuse I'm running with.

Or I could use that it was one of the first few things I made on my new serger (which it was) and I'm still learning how to use the darn thing so this ended up being half sewn on my Pfaff Ambition and half sewn on my Babylock Imagine. Heck the excuse doesn't matter. It's got some issues but it's all good. The hem is a tad wonky but not too noticeable. The side seams ended up pulling a bit and the bust....well I think I need to make some alterations on the armhole and shoulder. It's hard to see in the pics but the armhole's underarm area is about 2" over too far. I don't want to make a smaller size though as the bust coverage doesn't pull and I like the fit. So my good ol' sloped shoulders and small back are going to cause me to do a bit of tweaking. I need to lift up the armhole a bit and take the end of the top of the shoulder in about 1/2" or so give or take.

I love all the variations you can make with this dress too! But the collar? That was what sold me. I heart that collar. It's so flattering and just adds a certain bit of interest to a simple dress. I didn't put pockets on this one but next time I will for sure. I miss them. I can't seem to make anything without pockets lately or I feel nude and silly always wondering where the heck to put my hands.

I definitely think this is a curve flattering dress. If you get the right size for your shape and do a few alterations I think it could be a go for most bodies. 

I feel pretty good in it even though it hangs quite close to my problem area which is my tummy. The skirt seems to kick out a good spot which doesn't show it too bad from the side view but also doesn't add width either so overall I like that. It's a nice slimming a-line. My next one will be a tad longer too. I didn't have enough fabric and just barely made it for this length. So it's a "must wear leggings under" sort of dress. Mine ended up more tunic than dress though I did make it with the intention of wearing it with tights and cute flat shoes. Next time at least 1" will be added for my frame.

I can't wait to wear this for the fall and winter! It looks great with knee high boots and this polka dot print from Girl Charlee is warm and cozy. Just perfect for the climate I live in here on Vancouver Island. Once the rain starts that's all we get for months. So boots, sweaters, warm fabrics and cuddly cowls are a must at all times.

Have you made a Coco yet? Did you sew up a top or a dress style? What variation did you choose? I'd love to see and hear about it ladies! Show some pics! 


PATTERN || Coco by Tilly and the Buttons
FABRIC || Similar to this Light Gray Dot on Black Ponte de Roma via Girl Charlee
SIZE MADE || Size 7 (which is for Size 42" bust, I'm a 41" bust)
MODIFICATIONS || None, but had made an error sewing hip and hem. Need to do adjustments on  armhole and shoulder for next one.
BOOTS || Old Navy

READING || BASIC BLACK BY SATO WATANABE

BOOK REVIEW | BASIC BLACK BY SATO WATANABE ON VERYSHANNON.COM
Basic Black by Sato Watanabe | Tuttle Publishing
I'm so excited to add Basic Black, another lovely Japanese sewing book by Sato Watanabe, to my collection! 

Some of you may know I used to be a hairdresser. While what you didn't know was that all I used to wear was the color black. The salons I worked for at the time encouraged the stylists to all wear black.  It was considered moody and stylish. All the color I so embrace now was in my nails and hair. I have to admit that after leaving the industry it took me a long time to "break the black" and start adding color to my wardrobe. I'm happy to say that now black has a home in my closet amongst tons of color and prints. I've come a long way :)

Even though I fought to add color to my clothes I still love black. It's slimming, classic, sexy, stylish and just cool. I always feel good when I wear black so I was excited to hear about Basic Black: 26 Edgy Essentials for the Modern Wardrobe. I wasn't disappointed. True to Sato's style there is a pattern in here for everything - 26 in fact! Yep, that's right - 26! Tops, dresses, jackets and more. The fabrics are interesting and the designs are more body flattering than most of the other Japanese sewing books you see on the shelves. Basic Black is another great English edition of a Japanese sewing book.

BOOK REVIEW | BASIC BLACK BY SATO WATANABE ON VERYSHANNON.COM


BOOK REVIEW | BASIC BLACK BY SATO WATANABE ON VERYSHANNON.COM

The patterns in the book are lovely. I really loved the Lace Shirred Blouse, Blocked Quilting Zip-Up Jacket, Zip-Up Vest with High Neck, Frilled Shirt in Charcoal, Tunic Blouse with Lace-Trimmed Armholes, and Flannel Short Coat. I could honestly see myself wearing and sewing all of these. I consider a book a win/win if I want to make at least 3-4 patterns out of it. So this one is on a roll considering I trimmed down my list to write on here...haha. There is a nice variety of styles and fits in this book that give the reader lots of style options for their wardrobe.

Basic Black features bright, modern photography for the first half of the book and the second half is the written patterns accompanied by clear, easy to follow diagrams. I don't know about you but I just swoon over these kinds of diagrams. So pretty! The pattern pieces themselves are tucked neatly away in the back flap of the book. Sato also covers some basic sewing tools and how to use the patterns in the book. For a book filled with black clothing Basic Black still feels lively, bright and energetic.

BOOK REVIEW | BASIC BLACK BY SATO WATANABE ON VERYSHANNON.COM

The only con I have to the book is the sizing. This is very common though for Japanese sewing books. The larger sizes don't go up very high so I usually fall on the last size or not in the range at all. The books sizing is broken down into 3 categories - "loose", "garments with darts & shaping seams" and then finally "fitted" which was nice to see. These are listed all on one page and it definitely makes it easier to see what will fit and what won't. It was a nice addition.


AUTHOR | Sato Watanabe
PUBLISHER | Tuttle Publishing
PROS | 26 patterns! Huge variety of styles and fits. Even though all black garments the book still feels lively and nice to read. Great diagrams.
CONS |  Sizing doesn't go high enough.


Overall I give this book 2 thumbs up. I have a soft spot for Japanese sewing books and their aesthetic and styling. This one will have a lovely place on my bookshelf. If you are a fan of Japanese sewing books I think you will find this one a fresh surprise amongst the more traditional loose fitting styling of the more common ones out there.

Are you a fan of Japanese sewing books? Have you read this one? What was your favorite pattern from it? Let's chat!

*This post contains affiliate links. All opinions expressed are my own.

GIVEAWAY || FAT QUARTER SHOP FABRIC GIVEAWAY!

New Home Fabric Giveaway || VeryShannon.com

We're moving into our first home this upcoming weekend and what better way to celebrate than with a fabric giveaway from Fat Quarter Shop!

It's been an exhausting month to say the least. With constant packing, a heatwave, summer vacation, more packing and work all put in there too, we are soooo ready to be in our new home. None of us like living in chaos. I'm eagerly counting down the days that I can be out of our box filled condo and making memories in the new house. So excited!!!!

One of the things (besides the obvious of course like a yard...a yard...pinch me now!) I am looking forward to about living in a house is getting to decorate and do some DIY & sewing home decor projects.  Living in a rental condo I always found myself neglecting my love of DIY & home decor. I can't alter anything in here and without an outdoor space there was no painting/sanding etc for this momma. We've been in our rental for 6+ years so I can't wait to start making, painting and creating some new lovelies for our house.  I'll be sure to pin projects as I find them (you can follow me on Pinterest HERE)!
Cotton + Steel Fabric Collections & Basic Collections #cotton+Steel #fabric
Cotton + Steel Fabrics & Basics
I've also been holding off on ordering new fabrics until we are in the new house since I haven't been able to do much sewing these past few weeks (sob...sob). But I can tell you that as soon as I can lovingly add some new babies to my shelves I will be having a spree of Cotton + Steel prints and basics from Fat Quarter Shop! Oh my, oh my. I've been lusting after these before I even saw them when Cotton + Steel was just forming. So many of these prints and basics would make lovely projects! I can just picture some new duvets for the girls beds in the Mustang Line, new pillow covers for my couch from Moonlit, floor cushions for their playroom from Hatbox, dreamy play tents, and table & kitchen accents etc...the list goes on! I can't even choose a favorite out of all the prints because I'm def crushing big time on the Cotton + Steel basics! I want all of them!

You ready to win some new fabric?


THE PRIZE
One lucky winner will win a $50 Gift Certificate to Fat Quarter Shop! Thanks Fat Quarter Shop!

HOW TO ENTER
- Simply leave me a comment letting me know what fabric line you're currently crushing on!
- Bonus entry: Like Fat Quarter Shop and/or Very Shannon on Facebook and leave additional comments letting me know you did that too.

THE RULES
- You must leave a valid email address in your email or you will be disqualified.
- Giveaway is open till July 28th, 2014, midnight, PST.


Good luck and thanks for your understanding over the last few weeks & the next upcoming few while the blog has been quiet during this special time in our lives :)

And a special thanks to Fat Quarter Shop for the generous giveaway! You can find all things FQS below.

WEBSITE || BLOG || TWITTER || FACEBOOK || PINTEREST || YOUTUBE


QUILTING || ANNIVERSARY SWOON QUILT

Swoon Quilt Sewn by VeryShannon.com #quilting #swoon

Earlier this spring I gave my parents a special surprise anniversary quilt - a Swoon Quilt to be exact.

It was the most challenging sewing project I've made to date. As a quilter who is still learning (and one who hates cutting) this was a mammoth project to undertake. While I enjoyed making it I hit a lot of bumps in the road that weren't pattern related. Some oopsies (mental note to buy a 1/4" foot for my machine) and some piecing errors but overall, muck ups and all, I'm so proud of this quilt. I learned so much.

My good friend and amazingly talented quilter Jeni of Quilted on the Rock (she's a professional long arm quilter with some mad skills!) was the shining star of this project. She saved me and cut out all the white pieces for me (thank you again for saving my life Jeni), finished my quilt top, lovingly pieced my back with a fun off center strip of scraps, quilted this gorgeous beauty & more! I am in awe of her talents! Every quilt she makes is beautiful but this one holds a special place for me. I highly recommend her.

Jeni helped me push through this project when I didn't think I could finish it, never mind continue sewing it. With loads of deadlines, busy mom life, and other time constraints it was literally down to the wire to get it to my folks. She cheered me on the whole way and rescued me an infinite number of times! I sewed all front blocks together, the special message on the quilt back and sewed the binding on the quilt. Seeing this quilt come to life with her quilting magic on it will be a moment I will always remember. She did such a special job of hiding all my oopsies and making this quilt shine! My points aren't all perfect and some don't even line up correctly but guess what - I don't care! I love it anyways! And that's hard for the perfectionist in me to admit :)

Swoon Quilt Sewn by VeryShannon.com #quilting #swoon

You see this was a special anniversary gift to my parents from myself and my two sisters, but the quilt didn't get given to them in Sept 2013 as planned. It got gifted to them in May 2014 instead :) They don't live in town so it actually worked out in my favor to be with them when they opened their SURPRISE present! My mom is also a quilter - she hand sews all her quilts and it blows my mind, so I knew this would be a gift they would both treasure. There is a special message on the back of the quilt as well from my all of our families to them with a lovely quote that I stitched onto the quilt.

I wish I had a bit more time to do a "proper" photoshoot of the quilt while they were here to really show it off but the odds weren't in my favor. I'm just happy it got done and given to them so we did a quick shoot in the vacation rental they were staying in. With a hot, full sun day I had no choice but to shoot indoors (boo urns) but I hope these pics will give you a bit of an idea of my swoon.


QUILT DETAILS
PATTERN
Swoon by Camille Roskelley

FABRICS USED
All prints from Flea Market Fancy by Denise Schmidt
White Solid: Kona Cotton Snow
Grey:  Kona Cotton Medium Grey
(Special thanks to Holly for helping me get just the right tone of grey & white for this quilt!)

QUILTING
Quilted by Jeni Mummery of Quilted on the Rock

Swoon Quilt Sewn by VeryShannon.com #quilting #swoon
Swoon Quilt Sewn by VeryShannon.com #quilting #swoonSwoon Quilt Sewn by VeryShannon.com #quilting #swoon

A big special thank you to Jeni again for being such a special friend and for her awesome sewing and quilting skills! I love ya girl!

And to my parents - I hope you cherish this quilt and it keeps you warm and surrounded with love, always. I love you both.

Have you made a Swoon Quilt before? Are you also learning to quilt? I hope all my american friends have a wonderful 4th of July tomorrow!

MOMENTS || ON THE DESK & ON MY MIND

FRANKIE coming soon! VeryShannon.com

This is what's on my desk right now. I'd show you the rest but then I'd be ruining some upcoming surprises...hehe.

I've been working so hard on getting FRANKIE ready for testing and out for release. I love this little dress so much and there are so many options/variations I think you guys will all dig it too. I'm sewing up the last draft this weekend and will hopefully have a call for testers out soon...very soon (fingers crossed). FRANKIE will be available in sizes 2T - 10. I've been staying up late and working so hard to get this fun dress ready for you all!

For those of you who live in BC in Canada who have kiddos I'm sure you are all struggling to find balance at an unexpected time. We've had a teacher strike ongoing here throughout most of June and it cut our kids school year short with no final report cards either. I'm so thankful that I work full time from home so I could switch my schedule to work more evenings right now since I've got both kids home from school way earlier than expected. Needless to say it's delayed some of my time lines but that's life right?

We've been trying to keep busy with fun activities, sunshine, and lots of playing! I think this has been my fave summer with them so far if you minus the packing...lol. I think it's the age. The kids are 7 and 4 now and going to the playground allows mom a bit more time to sit and knit while they play. I picked up a funky new picnic blanket and have been happily lounging while watching the kiddos play. And if you've been reading this blog for a long time you know how much I hate the playground. (Don't judge me...lol.) It's a huge statement coming from me that I've actually enjoyed the last few outings I've had with the kids at the park.

Kids Crafts - Summer Fun Calendar // VeryShannon.com

Our budget doesn't allow for me to put the kids in summer camps so we have to be creative and come up with ideas to keep busy on our own. We decided to do the same activity we did last summer that we enjoyed so much! You can find the link HERE for our Summer Fun Calendar Craft. We plan on making ours today for July. I can't wait to hear what ideas the kids have for each days activities. It's hilarious the things their little minds come up with and the drawings they do to accompany them. It's definitely a hit in our house!

What are some of your favorite things to do with the kids in the summer? What have you been busy making and creating this week? I hope you all have a wonderful and sunshine filled weekend!

SEWING || FREE REVERSIBLE BOX TOTE PATTERN!!!

I've got a new FREE pattern for you all today! I'm on such a huge project bag/tote/pouch kick this year! I just can't seem to get enough and the Reversible Box Tote is just what I needed!


Perfect for carrying around all my knitting projects, journals, notes, & yarn spools! Heck you could even use this for the beach, for shopping, as a purse and more! The shape holds a ton and is so comfy to carry! I've been wanting a project tote that I don't have to wear over my shoulder. With my bad back sometimes I just find it easier to carry them by hand and let's admit it - some of my normal totes end up dragging on the ground or I get scared they are going to rip carrying all my loot around.


The Reversible Box Tote is sturdy, stylish and just waiting for you to sew one (ahem..or a few) up! 

Trust me, I am going to make at least a few more!! It's a super quick and easy sew that is suitable for a beginner sewer and beyond! So don't be scared if you're just learning! There's room for you to customize to your hearts content too! Want more pockets or ones with a zipper or velcro? Go ahead - add them on! Want a quilted look? Skip the interfacing and add batting instead and quilt it to your outer bag fabric for a custom look! You could even color block! So many options! See - you can't have too many when they can all look different!

You can choose to download the free pdf from our shop HERE or direct HERE if you'd prefer :)

*Note: Make sure to download the file first and then print from Adobe Reader - not direct from preview/google drive or the picture quality/sizing can be wrong.


I used the gorgeous new line from Sara Lawson (of Sew Sweetness) for Art Gallery Fabrics called Jungle Ave.

It's part of their awesome Limited Edition line that is drool worthy! 

I am HEAD OVER HEELS in love with the combos of black/white and that fuchsia/pink! Love it! I was so happy when Sara asked me to join in on her fabric tour and to sew something up using Jungle Ave.! And since Sara is the queen of bag patterns I thought it was only fair to honor her and sew up this tote in her line! Sara is so sweet and one talented lady!

For my Reversible Box Tote I used the following prints from Jungle Ave.

Outer Bag // NeighborHoods

Inner Bag // Dotted Boulevard

Pockets // Word on the Street


So....you ready to sew one up? Grab your latest fabric crush and let's get making!

For the FREE

Reversible Box Tote pattern and information please visit our Reversible Tote Pattern page HERE or if you would prefer you can download it HERE

Happy sewing!!! Use #soveryshannon to share your projects on social media!


SEWING || LOTUS POND RUBY DRESS

Lotus Pond Fabric Tour - Ruby Dress by Made By Rae, sewn by VeryShannon.com

So excited to show you all my new Ruby Dress made from Rae Hoekstra's pattern and sewn with her new fabric line Lotus Pond!!!

You all know how much I adore Rae and all her creative talents and endeavors so I'm super happy to be part of the Lotus Pond Tour that's going around on right now.  If you haven't seen Lotus Pond for the fabulous Cloud 9 Fabrics you must get your hands on some! It's fresh, fun, and....well...just plain scrumptious! I love every print I've seen! Plus the quality of Cloud 9 Fabrics is fabulous as well as Rae's aesthetically pleasing uses of her color palette! I cannot wait to get some more to whip up some new outfits for the kids.

But instead of sewing for them this time this momma needed a new summer frock to wear. I wanted something a) comfy b) vacation ready c) something I could throw on over a bathing suit or easily pair with a fab pair of leggings & boots/shoes. Enter the Ruby Dress. A quick and easy sew that fulfilled all my holiday requests. We're going on our first vacay in years this summer and I will be lake/pool side for 7 days and could easily imagine the Ruby Dress being a staple part of my holiday wardrobe. Plus Rae just looks so darn cute in hers (see the Ruby page here) I couldn't resist channelling my inner Rae :) I sewed mine up with Fluttering Fields (bottom portion) and Meadow Blossoms White (upper portion) from Lotus Pond.

I made my Ruby Dress with Size Large Bust and an XL for the bottom portion. I got a great fit on the upper portion which was my biggest fear. I didn't want the bust area to pull or distortion due to the size of my ahem....girls. Well Rae gives you an upper bust and a bust measurement to go by, as well as hip so I found this dress easy to accommodate my body shape. I used my lazy man's hip seam again - aka, did a 1/4" seam allowance instead of a 1/2" as called for. I like doing this sometimes when I want a tad more ease (this pattern calls for 4" of ease for comfort) and I don't feel like I need to go up a full size in the pattern.

I love that this dress is so versatile! I was bad and already wore this before the photo shoot. In fact I wore it a few hours I finished sewing it. 

I paired it with my dark denim skinny jeans, my new fave shoes (see them HERE), and my never leave the house without light coral cardigan. I also could see this in my closet with my grey capri leggings, or in the fall paired with full length leggings and my fave boots with a handmade cardi. A sign of a great pattern :) I do need a new belt though. I noticed a lot of people belt their Ruby Dresses and this is a cute look! I just have bad juju trying to buy belts. They never look right on me and hit me in my trouble spot so I'll be on the lookout for one to pair with this as well.

Overall if you've got a bust and curves and wondered if you could pull off the Ruby I say go for it! Play around with your sizing and have some fun! I hemmed mine a heckuva lot shorter than the pattern size states to show off the legs to slim my overall body. I think mine is about 2" - 2 1/2" above the knee and I'm a shorty at 5'4".


A big congrats to my lovely friend Rae on another wonderfully inspiring collection! You consistently amaze me with your talents m'dear. Thank you sooooo much for having me along!!! Sending big Canadian hugs my way to you luv <3

DRESS: Ruby Dress from Made by Rae
SIZE MADE: Size Large for upper portion and XL for the lower portion.
MODIFICATIONS: Used a 1/4" seam allowance for the bottom portion and cut and hemmed the dress shorter. 
FABRIC: Fluttering Fields (bottom portion) and Meadow Blossoms White (upper portion) from Lotus Pond by Rae Hoekstra for Cloud 9 Fabrics

Have any of you made a Ruby Dress yet? Have you got your hands on some Lotus Pond yet? Are you planning on making any vacation outfits? Let's chat - coffee's on....

GIVEAWAY || WARP & WEFT SEWING GIVEAWAY!!

Merchant & Mills Giveaway from Warp & Weft // VeryShannon.com

I'm worried for my computer I'm drooling so much over today's giveaway from one of Canada's loveliest fabric shops -  Warp & Weft!!! Wowsa!

**This giveaway is now closed. Thank you for all of your entries.**

Warp & Weft is an amazing online fabric shop that is also proudly Canadian (for all you fellow Canadian shoppers shipping rates are fab!). Esmari has such a great eye and aesthetic so it's only natural that she would stock Merchant & Mills products in her awesome shop! So when I did my book review for the Merchant & Mills Sewing Book yesterday (read it HERE) we only thought it fitting to offer you all a fun giveaway too! Can we say thank you Esmari!!! She's so great!

www.warpandweft.ca

Besides her generous giveaway prizes she is also offering you all 10% OFF at Warp & Weft and that includes ALL products - even sale items!! Wahoo! Just use code "veryshannon10" at checkout!! Happy shopping my friends! You will not be disappointed! I love shopping online in shops like Warp & Weft.

Merchant & Mills Giveaway from Warp & Weft // VeryShannon.com

Esmari has curated a shop filled with exquisite textiles, notions, embroidery, high quality fabric, lovely kits & more! She even has fun workshops! I seriously suggest perusing the website and reading her blog for something special!

You ready to here what you could win?

// THE PRIZES
Prize Package #1
- 25 Merchant & Mills Sewing Needles
- Bamboo Point Turner from Merchant & Mills
- Merchant & Mills Tape Measure
- 1 ounce Dressmaking Pins from Merchant & Mills
- copy of Merchant & Mills Sewing Book
Merchant & Mills Giveaway from Warp & Weft // VeryShannon.com
Prize Package #2
- Merchant & Mills Tie-End Bolster Cushion Sewing Pattern
- Rapid Repair Kit from Merchant & Mills
Merchant & Mills Giveaway from Warp & Weft // VeryShannon.com
// HOW TO ENTER
- Visit Warp & Weft notions section and then leave us a comment letting us know what your favorite sewing notion is.
- *Bonus Entry: Like Warp & Weft and/or Very Shannon on Facebook and then leave us a separate comment letting us know you did that too.
// THE RULES
- You must leave a valid email address in your comment or you will be disqualified.
- Giveaway open until May 25th, midnight, PST.
You can find all things Warp & Weft below:


Good luck and a big thank you to Warp & Weft for the wonderful giveaway!

*All images courtesy of Warp & Weft.

READING || MERCHANT & MILLS SEWING BOOK REVIEW

Merchant & Mills Sewing Book // Review on VeryShannon.com

Oh my! I could hardly contain my excitement when the new Merchant & Mills Sewing Book by Carolyn N. K. Denham showed up in my mailbox!!!

I am a HUGE fan of Merchant & Mills and their new sewing book does not disappoint! Beautifully bound and designed, this lovely addition to any sewers collection stays true to the Merchant & Mills brand. Their notions, scissors, pins & needles are coveted and some of my absolute faves! You can't miss spotting a fab Merchant & Mills product or pattern and I was so happy to see all that gorgeous styling put into one book published by Chronicle Books.

 Merchant & Mills Sewing Book // Review on VeryShannon.com

The Merchant & Mills Sewing Book is filled with techniques, helpful information, tips and more! I honestly know I'll be reading and re-reading this book for many years. My absolute favorite part of the book is the Foundations section. So much amazing info in this section of the book! I wanted to photograph all of it but then realized I'd be showing you the whole book! And let's not forget the patterns! 15 of them! All fabulous and very handy! I'm dying to sew up the Duffel Bag and the Tote Bag asap!

All the sections include signature styled Merchant & Mills photographs and diagrams and all the patterns are accompanied by great illustrations along with easy to follow instructions.
Merchant & Mills Sewing Book // Review on VeryShannon.com
Here's a quick run down of what's included in this must have book!


INTRODUCTION
// Keep it Simple and Do It Well

PART I: THE FOUNDATIONS
// Sewing Tools: Furnishing Your Toolbox
// Haberdashery: A Panoply of Small Things
// Basic Sewing Techniques: The Inside Information on Construction
// Patterns: Your Template for Making
// Cloth: The Beautiful Raw Material
// Pressing Matters: A User's Guide to Good Flattening

PART II: THE PROJECTS
// The Calico Bag
// The Tailor's Ham and Sleeve Roll
// The Ironing Board Cover
// The Hussif
// The Maker's Apron
 // The Bolster Cushion
// The Pillow Cushion
// The Button Cushion
// The Throw
 // The Document Bag
// The Flight Bag
// The Duffel Bag
// The Tote Bag
// The Tailored Shawl
// The Fisherman's Top

Merchant & Mills Sewing Book // Review on VeryShannon.com

Overall I give The Merchant & Mills Sewing Book two thumbs up! I would recommend this to any sewer looking for a stylish addition to their library. It will be well loved and read in my home for years to come!

You can find all things Merchant & Mills on their website HERE.

Are you a Merchant & Mills fan? Would you like to win a copy? Stay tuned for some seriously fun prizes tomorrow on the blog!

SEWING || FOLDED TRIANGLE FAT QUARTER BAG TUTORIAL

SEWING || FOLDED TRIANGLE FAT QUARTER BAG TUTORIAL

Learn how to sew a fun folded triangle bag using only 3 fat quarters of fabric with the free tutorial below!!!!

Read More

STYLO ISSUE 2 || THE FRANKIE DRESS PATTERN (COMING SOON)!


I've been excitedly counting down the days until the newest issue of STYLO was out and today's the day!!!!! My upcoming dress pattern - FRANKIE, is featured in STYLO Issue 2!!!!

I've been sketching the design for FRANKIE since last fall and knew I wanted it to be our next VERY SHANNON sewing pattern for this sprint! I've got a soft spot for color blocking and thought it would be a fun detail to add to such a cute dress silhouette! My girls and I just love it! I'm aiming for a late May/early June release so stay tuned! It's such a fun sew! I'll be putting a call out for testers soon as well.

THE FRANKIE DRESS FEATURES:

// No closures - that's right! No zippers or buttons!
// Color blocked bodice 
// Options for a bodice with no color blocking
// Options for sleeveless, short sleeve and 3/4 length sleeve
// Special pleat details on the skirt
// Multiple skirt length options
// Pockets!!! 
and more!!!!!

THE FRANKIE DRESS Sewing Pattern by VeryShannon.com - Coming Soon!

FRANKIE makes a versatile dress filled with options so it can be worn all year round. I can easily see it styled for playtime over some cute leggings but also easily worn as a sleeveless maxi length just perfect for a flower girl or a summer dress at the beach! There are so many options and ways to customize it and make FRANKIE work for that special girl in your life!

I can't wait to show and tell you more! And I will soon! But for now you can check out the pics over in the newest issue of STYLO and see some below!!!! I hope you will all love FRANKIE as much as I do <3 

Also make sure you flip through the whole issue of STYLO! There are amazing projects in there and I'm so honored to be included. But I also have a special sale on in honor of STYLO and you can get the discount code in the newest issue!!! The sale is valid until May 31st, midnight, PST.

THE FRANKIE DRESS Sewing Pattern by VeryShannon.com - Coming Soon!

// Have you signed up for our free newsletter yet? Sign up HERE to stay up to date on new pattern releases, sales and more!!!

READING || BOOKS ON THE TABLE


I've got some fun new books to show you all today! You ready to get making?

I love books and I love adding new ones to my collection. I also enjoy sharing them here and reviewing some of my faves for you all! I've decided it would be fun to keep a new series running on the blog called "books on the table". I've done a few now and have enjoyed them as I hope you all do too.


Today I've got some good ones! Not all sewing either which I think is fun! The current books on my table are:

MAKE YOUR MARK by Lark Books
NEVER BEEN STITCHED by Amanda Carestio
SEW QUICK SEW CUTE by Fiona Goble
FABRIC BLOOMS by Megan Hunt

For the reviews & to see more pics keep reading!


Make Your Mark: Creative Ideas using Markers, Paint Pens, Bleach Pens & More is so fun! Seriously! I adore this book! And it comes with a pen!!!! The projects in it are all great fun! My favorite ones are the modern and geometric ones for dishware and more! I can't wait to try this out! It's right up my alley and something I've been wanting to try for a long time!

The book has clear pictures, great instructions and includes 50+ templates as well! If this is something you've been wanting to try I highly recommend Make Your Mark!


Next up is Never Been Stitched: 45 No-Sew & Lo-Sew Projects by Amanda Carestio! This book is filled with projects that are easy to make, involve little or no sewing and range from accessories to clothing & toys! If you are new to sewing or looking to try your hand at it you may find some fun projects in Never Been Stitched!


Sew Quick Sew Cute by Fiona Goble is filled with projects just perfect for any project you're craving! They are all quick sews and like the book says - cute! I really love the wide range of projects included in this book and can see myself sewing up more than a few of them! How cute are those underwear drawer sachets below! Adorable!


Also, don't forget to check out Fabric Blooms: 42 Flowers to Make, Wear & Adorn Your Life by Megan Hunt! A pretty book filled with instructions on how to make blooms with lovely fabrics, felt and using stitched embellishments.

Which books are you currently reading? Do you have any new faves you added to your collection? I'd love to hear about them!

GIVEAWAY || FAT QUARTER SHOP LOTTA JANSDOTTER - SYLVIA FABRIC GIVEAWAY!!!

Lotta Jansdotter Sylvia Fabric Giveaway from Fat Quarter Shop // VeryShannon.com

Who wants to win some fabric? I love having a fabric giveaway and today's Fat Quarter Shop one doesn't dissapoint! 

You all know one of my favorite fabric designers is Lotta Jandotter so I'm super excited to show you one of my latest finished projects using her gorgeous new line "Sylvia"! I am absolutely head over heels in love with this black and white palette. In fact, I'm so much in love with it that I'm now going to bed on it every night. That's right - I made new pillow covers!


What better fabric to rest my head on each night than some Lotta Jansdotter? Hehe. I know. I need help but hey, what can I say - I love these prints and they just happened to be just the thing I needed to go with my new duvet and blanket!

Lotta Jansdotter Sylvia Fabric Giveaway from Fat Quarter Shop // VeryShannon.com

Now I happened to have bought myself a half yard bundle of Sylvia and I decided to use 4 of my prints to make the pillow cases. I got to use my nifty new serger (review coming soon) that I also am smitten with so whipping up these pillow cases was a breeze! I sewed them up the other night while the hubby was working tax season overtime and then slept on them that night!

I used the following prints from the line Sylvia by Lotta Jansdotter for Windham Fabrics for my pillow cases:

// Black Tav  // White Tav // Black Suvi  // White Suvi

Aren't they pretty? I seriously wanted to lay in that spot all day. The sun was out, my bed was cozy, my pillows were soft and the newest issue of Uppercase Magazine (all on textile design) just seemed so fitting to keep in the shot since I've been indulging in it the last week or two. If you happen to read the issue I have a wee mention/pic in it of my Sweetheart Dress!Squeee!

Lotta Jansdotter Sylvia Fabric Giveaway from Fat Quarter Shop // VeryShannon.com

But moving on back to my pillows...ahhhh, the pillows. Don't you all just love new pillowcases? I love anything new for my bed (which I plan on buying this year too), our mattress is currently on the floor thus why my bed side tables look sooooo high. And yes, I'm 36 and my mattress is on the floor...haha. Our bed broke. What can I say? Low on the priority list. I'm saving up for a King sized. Once you have more than one kid you need a King.

I used this tutorial from my pal Dana over on MADE as a rough guideline for sizing etc to make my pillow cases. Since I was using half yard pieces I made a way wider side accent for mine.

What am I going to do with the rest of my half yard bundle - make throw pillows for my grey couch :) Yep. They will go with my Lotta Jandotter quilt and match my bed pillow covers...lol. The house of Lotta happening over here...lol.

Want to see some more pics and find out what you could win? Keep reading for more!

Lotta Jansdotter Sylvia Fabric Giveaway from Fat Quarter Shop // VeryShannon.com


THE PRIZE
- One lucky winner will win a Fat Quarter Bundle of Sylvia by Lotta Jansdotter from our awesome sponsor Fat Quarter Shop.

HOW TO ENTER
- Simply visit this page featuring Sylvia over at Fat Quarter Shop and then come back and tell me which print is your favorite!
- Bonus Entry: Like Fat Quarter Shop and/or Very Shannon on facebook and then come back and leave me ANOTHER comment letting me know you did that too.

THE RULES
- You must leave a valid email in your comment or have a valid email associated with your profile or you will be disqualified.
- Giveaway is open until Sunday, May 4th, 2014, midnight, PST.

A big thank you to Fat Quarter Shop for the awesome prize! You can find all things Fat Quarter Shop below:

WWW.FATQUARTERSHOP.COM

WEBSITE  //  BLOG //  FACEBOOK  //  TWITTER  //  INSTAGRAM  //  PINTEREST

Good luck and happy sewing!!!!! I can't wait to see who wins!

READING || HAPPY HOMEMADE SEW CHIC & SEW CHIC FOR KIDS BOOK REVIEW!


I have a serious crush on Japanese sewing & knitting books. An "I will pore over every image and diagram a gazillion times" sort of crush. 

The aesthetic, the vibe, the layout - I love it all. I'm heavily influenced by the clean lines and the fresh feel of Japanese books. They just get me all creatively inspired and, of course, dying to make everything in the books!

I was so excited to get my hands on two of the popular Happy Homemade series "Sew Chic" by Yoshiko Tsukiori and "Sew Chic for Kids", by the talented Ruriko Yamadaboth, translated and published in English by Tuttle Publishing.  And yes, you read that right - they are in English! I have to say that when they started releasing this line in English I was over the moon. I'm a visual and a technical learner. I like to read and see the instructions so I love that I can now read the instructions as well as see them. Their diagrams are gorgeous and very well done but I longed to read the words in the book as well.


Keep reading below to see my review & more pics!


// SEW CHIC FOR KIDS

The best thing about Sew Chic for Kids is that I love pretty much every pattern in it.  

Ohhhh....the clothes, such lovely clothes...and for both boys and girls!!!! Can I hear a yay?!The book is filled with 20 wonderful essentials for any child's wardrobe. Plus they are the type of clothes that are the ones that you enjoy sewing as much as your children love to wear! The book includes patterns in the back, and lots of gorgeous images in the front. Instructions are given in written and diagram form. The pattern pieces are in the back of the book and head's up - they don't include seam allowances. But don't fret - the book has a section showing you how to add them, how to sew, and more tips, techniques and instructions.

The pattern pieces are included in the back of the book and there are 2 double sided pattern sheets, giving you a total of 4 pattern sheets. Pieces are spread out throughout the pattern sheets so I highly recommend you check the contents list on each sheet to make sure you aren't missing any pieces for the garment you are making before you start sewing. It sounds harder than it is. Once you start using them you'll see what I mean.


I definitely recommend Sew Chic for Kids and can't wait to sew something up for my girlies and my nephew. But first I have to choose my favorite one to start! This is proving to be much harder than I thought! I love them all!


// SEW CHIC

Sew Chic just oozes relaxation. The pictures depict the kind of girl I so wish I could be. The clothes are comfortable, effortlessly chic and so lovely. 

Now I've got me some curves so I can't pull off all of the looks but there are definitely some I could wear! The book includes 20 patterns ranging from tunics, pants, skirts, dresses and more! My fave piece to try is that lovely jacket shown in the middle shot below. It's something missing from my closet and think it would be a flattering piece for many body shapes. Just like Sew Chic for Kids, Sew Chic has inspiring and clean images in the front, patterns in the back. Patterns contain written instructions as well as diagrams. No seam allowances on the pattern pieces but instructions written in the book on how to add them making it not seem so overwhelming.


The pattern pieces are included in the back of the book and there are 2 double sided pattern sheets, giving you a total of 4 pattern sheets. Pieces are spread out throughout the pattern sheets so I highly recommend you check the contents list on each sheet to make sure you aren't missing any pieces for the garment you are making before you start sewing. It sounds harder than it is. Once you start using them you'll see what I mean. 

It also includes a section on tips for sewing, how to make bias strips & v-neckline facing, attach facing & binding and how to sew pockets. As well as how to trace patterns onto paper, add seam allowances, straighten fabric, pattern placement and how to take your measurements. It's all done so tidy and neat all of that literally only takes a few pages!


Women with curves take note though - the book does only go up to a certain size level and I know a majority of us are bigger than their largest size. If you have some alteration experience I'm sure you could grade up a bit to make them work but I wanted to include this in my review as I'm someone who has a hard time myself finding patterns that are mainstream that fit my curvy shape. The largest bust size is 40 1/4" and the largest hip size is 43 3/4". This isn't a direct con to this book though. Most Japanese sewing books have sizes in the smaller ranges so it's to be expected when you purchase them.

I still love Sew Chic. I still hope to sew some things from it and even aside from that, I just love looking at it! As someone who has published 2 books I get a real joy out of seeing how these are put together and I know they will be a well loved addition to my book library.


Both Sew Chic and Sew Chic for Kids are published by Tuttle Publishing and can be found at your local bookshop, sewing store and on Amazon. If you have a love for Japanese sewing patterns and books I highly recommend giving the English publications a try. The Happy Homemade series is amazing and always drool worthy. They make a lovely set of books to add to your sewing pattern collection.

Do you love Japanese sewing patterns and books?  Which book is your favorite? Have you made any of the patterns from Sew Chic and Sew Chic Kids?

P.s. Have a wonderful long holiday weekend! My oldest is turning 7 on Easter! Can you believe it! It feels like only yesterday that she was a baby! See you all on Tuesday! 

SEWING || FREE BONNIE DRAWSTRING PROJECT BAG TUTORIAL!

Bonnie Drawstring Project Bag Tutorial // VeryShannon.com

If you're like me, you always need as many project bags as possible. One is never enough. There are always more projects and I love it that way!

While I already have tutorials for our fun Reversible Sock Knitting Project Bag, Indie Project Bag, as well as our fun Brigitte Needles & Notions Zippered Pouch, I figured it was about time to whip one up for some of you beginner sewers that's a classic! A lot of my knitting readers are just getting into sewing and I thought that the Bonnie Drawstring Project Bag would make a great intro to sewing project for them that isn't boring, is fun to make but that also makes a great gift too! And more experienced sewers can play with fabric choices, add personal touches and customize to their hearts content!

You all know my personal motto is to get knitters sewing and sewers knitting! I live by that! So why not tempt the knitters to the dark side by getting them to make their own project bags that they all love? I know how much my friends and I adore our project bags and no matter how many I have I always add more. It's fun...what can I say!

When I spotted the new line "Sweet as Honey" from the uber talented Bonnie Christine a few months ago I was instantly in love. The colors, the patterns, the mixtures of designs - they were truly reflective of the style we love from Bonnie on her fab blog "Going Home to Roost"! I loved that she stayed true to her addicting aesthetic! The fabrics are as lovely as all of her work. And to top it off her line is available from Art Gallery Fabrics - one of my fave fabric lines. Their pima cotton is to die for soft and drapes beautifully!

When Bonnie asked me to join in on her Sweet as Honey Blog Tour I was thrilled! The only problem I had was deciding which fat quarters to use!!! I had already gotten my hands on some of the fat quarters so I luckily was able to mix and match for my project today! I highly recommend the prints in this line. They are so cheerful and beautiful and I find myself so drawn to them during the rainy season we are just putting behind us here.

Bonnie Drawstring Project Bag Tutorial // VeryShannon.comBonnie Drawstring Project Bag Tutorial // VeryShannon.com
Would you like to learn how to make our Bonnie Drawstring Project Bag? Let's get sewing! Read below to find out how!

BONNIE DRAWSTRING PROJECT BAG TUTORIAL

*Copyright 2014 VeryShannon.com. All rights reserved.  Email askveryshannon@gmail.com if you have questions.

MATERIALS

*NOTE: I made my project bag using 2 fat quarters that measured 19 x 22". The main portion of the bag is a 12.5"W fat quarter folded in half height wise. I have given instructions/dimensions for the fat quarter pieces below but will also list below the dimensions if you would like to use a different piece of fabric.

1 Fat quarter of main fabric cut to 12.5"W (19"H)
1 Fat quarter of accent fabric cut to 2 pieces 12.5"W x 6"H
OR
1 piece at 12.5"W x 19"H of main fabric (or 2 pieces at 9.75"H sewn together with a 1/4 SA with edges finished)
2 pieces at 12.5"W x 6"H of accent fabric
2 pieces of 1/2" twill tape at 32" - 35"L (or drawstring material of your choice..ex ribbon, fabric)
Removable fabric marker
Coordinating thread
Scissors or rotary cutter w/mat


INSTRUCTIONS

*ALL SEAM ALLOWANCES ARE 1/4" UNLESS OTHERWISE NOTED.

STEP ONE: PIECING TOGETHER YOUR BAG

*NOTE: I made my project bag using 2 fat quarters. I will give instructions/dimensions for the fat quarter pieces but will also list below the dimensions if you would like to use a different piece of fabric.

TIP: If you have sewn two pieces of fabric together to form your main fabric for the bag you may skip the step above.

Take your main fabric piece that is 12.5"W x 19"H and fold in half with right sides facing each other and press along fold. The fold will be the bottom of your bag.

With your main and accent fabric right sides together sew your accent fabric to both the top and bottom of your main fabric using either a serger or on your sewing machine. If using your sewing machine finish your seam allowance with a zig zag stitch or other appropriate stitch. Press your seam allowance towards your main fabric. *See diagram to the left.


STEP TWO: FINISH SEAMS
Using a serger (or a sewing machine) finish the side seams of the whole bag neatly right along the edge.

Measure and mark 3" down from the top of your bag. This will be where our opening for our drawstring will be. *See diagram below.

TIP: You can finish the seams using your sewing machine by using either a zig zag stitch, a mock coverstitch (or other appropriate stitch on your machine) or by using pinking shears.

STEP THREE: SEWING YOUR BAG
With right sides facing each other sew both side seams with a 1/4" seam allowance (if serging sew right along your inner serged edge) starting from the mark you just made. *See diagram below.


STEP FOUR: CREATING YOUR CHANNEL
We are now going to make the channel for your drawstring. You are almost there! Press your seam allowance open and towards the wrong side of your fabric carefully. Now fold down and press the top of your fabric down 1/2". Then press and fold again 1". Make sure your seam allowance is fully enclosed in your fold. We don't want this show from the outside of the bag. Pin along the entire top perimeter of your bag. Topstitch along this fold close to the inner edge of your fold neatly and precisely. Press well. *See diagram below.


STEP FIVE: PUTTING IN YOUR DRAWSTRING


Attach your safety pin to one end of your twill tape and pull the twill tape through the opening on your front left side and out through the front right side. Then pull it back into the right side of the other side of the bag (the back) and back out the left side forming a loop. Tie a half knot with both ends together. Repeat this step but this time entering in the channel from the front left side. *See diagram above and below.

I like to finish the ends of my drawstring off by serging and then pressing over 1/4" or so and stitching it down. This is optional though. Feel free to use or make whatever you'd love to have as your drawstring.


You did it! Yay! Great job! This is a great time to add your label or any finishing touches you may want! Personalize and customize to your heart's content! That's what makes these bags fun!!!!

Bonnie Drawstring Project Bag Tutorial // VeryShannon.com

Make sure you share your pics! Add them to our flickr group, share them on our facebook page, or comment with a link below! I love seeing your project pics!

You also do not want to miss all the stops on the Sweet as Honey Blog Tour! Thanks again for having me Bonnie! There have been some amazing projects!!!! Tomorrow the tour will be stopping to visit Heidi at Hands Occupied and yesterday a lovely table runner was made by Mel at Missouri Mel.

P.s. - if you love the basket in the shots above as much as I love mine it's from Tolt Yarn and Wool. I adore it! Plus you can wet it and reshape it!


Sweet as Honey Blog Tour // veryshannon.com

GIVEAWAY || FABRIC SPARK'S VERY SHANNON FAT QUARTER FABRIC BUNDLE!

Very Shannon Fat Quarter Fabric Bundle for Fabric Spark

As a sewing blogger I admit I've dreamed on many an occasion of having a fabric bundle named after me!

I was thrilled when the newest online Canadian (yes, I said Canadian - whoop whoop!) online store Fabric Spark opened! Daryl is one of our newest sponsors and I'm just thrilled to be working with her! She has curated a fresh and lovely fabric shop!

When she asked if I'd like to choose a fat quarter fabric bundle and offer a giveaway I was just over the moon! Can we say fuuuuuuun people!!! I was so giddy it took me a few days to choose! In the end I decided to go with a fun black/white palette! Since I've been doing some decorating around the house I've been on a serious black/white kick lately! All the pics above are of the Very Shannon Fat Quarter Bundle!

Very Shannon Fat Quarter Fabric Bundle for Fabric Spark

I hope you love this modern mix of prints and textures! I can easily see these fabrics going from throw pillows, quilts, accessories all the way to clothing! How fun would a Patricia Cowl be in these prints?

www.fabricspark.com

So would you like to win my "Very Shannon Fat Quarter Bundle"? Find out how to enter below!

// THE PRIZE
- One lucky winner will win the Very Shannon Fat Quarter Bundle from Fabric Spark. This bundle includes the following fabrics:

Suvi in White by Lotta Jansdotter, Tiny Gingham from Michael Miller, Leaves in Charcoal by Carolyn Friedlander, Suvi in Black, Crosshatch in black by Carolyn Friedlander, and Tav in White by Lotta Jansdotter

// HOW TO ENTER
- Simply leave me a comment letting me know what you would make with the Very Shannon Fat Quarter Bundle!
- Bonus Entry: Follow Fabric Spark and/or Very Shannon on facebook and leave me a separate comment letting me know you did that too.

// THE RULES
- You MUST leave a valid email address in your comment or you will be disqualified.
- Giveaway is open until Monday, March 24th, 2014 at midnight, PST.

Very Shannon Fat Quarter Fabric Bundle for Fabric Spark

Happy fabric shopping and good luck! I hope you will all enjoy this fat quarter bundle as much as I do!!!!!

SEWING || PERFECT PATTERN PARCEL & GIVEAWAY!

Ava Dress by Victory Patterns
I love indie designers and I try to support and sew with indie designer patterns as much as possible.

Especially this year as I try to handmade as much of my wardrobe as possible. It's such a great feeling to support another creative designer! So I was super excited to hear about the new Perfect Pattern Parcel!

What is Perfect Pattern Parcel? A wonderfully curated bundle of 5 independent designer patterns that supports charities with a fun pricing structure that let's YOU decide how much to pay!

Who is Perfect Pattern Parcel? "Put together two entrepreneurial makers driven by their internal voices and one self-taught hacker with an "if you build it, they will come" mentality, and Perfect Pattern Parcel was born. We are passionate about supporting independent designers in their craft and fostering a community of makers to grow. Our mission is to offer high-quality pdf sewing patterns written by indie designers while supporting children's education."

What's in Perfect Pattern Parcel #1? "Pattern Parcel #1 includes sewing patterns for women that are modern classics, featuring both flattering silhouettes and garments that are comfortable to wear. From a new little black dress to weekend play wear, the patterns in Parcel #1 have got you covered."

Summer Concert Tee by Dixie Diy sewn by True Bias
Summer Concert Tee by Dixie DIY sewn by True Bias
Dandelion Top & Dress by Disparate Disciplines
Accordian Bag by Sew SweetnessParcel 1 Collage

// Pattern Parcel #1 features the following patterns:
:: Accordion Bag by Sew Sweetness
:: Summer Concert Tee by Dixie DIY
:: Ava by Victory Patterns
:: The Skater Dress by Kitschycoo
:: Dandelion Dress & Top by Disparate Disciplines

Such a lovely collection of awesome designers!!!!! Each of the patterns in the Perfect Pattern Parcel #1 are highly recommended and a great addition to your wardrobe! Make sure you check out the Perfect Pattern Parcel today! You only have until this Friday, midnight EST! Happy sewing!

You can find Perfect Pattern Parcel here:


And don't forget to enter the Perfect Pattern Parcel Giveaway below!!! Som great prizes up for grabs!!!

a Rafflecopter giveaway

Disclaimer: The 5 PDF patterns offered in the Perfect Pattern Parcel #1 were provided to me free of charge for participating in the Perfect Pattern Parcel #1 Blog Tour but, as always, the thoughts expressed in this post are my own.

MAKING || WIP'S

Tim Horton's and knitting \\ www.veryshannon.com
Yarnster Hat in Malabrigo Rastita // www.veryshannon.com
Lotta Jansdotter Syliva // www.veryshannon.com
Sweet as Honey // www.veryshannon.com
My handmade lovelies // www.veryshannon.com

I love having works in progress. I love the idea of new possibilities, new ideas, new projects & new designs. The whole essence of making just gets me all giddy. 

I realized I hadn't shown any pics of my recent wip's on the blog lately. So I've got a few lovelies to share above of what I've been working on. If you follow me on instagram you have seen the progression of some of these for sure. My fave new socks in progress using the amazing Caterpillar Green yarns! I die. This self striping yarn is so AWESOME. But more on them next month! Stay tuned to win some of your own..hehe.

I'm also using the most gorgeous skein of Malabrigo Rastita to finally make a Yarnster hat for me! I loved this hat when I designed it last year (it's FREE!) but it resides in a local yarn shop and not on my head so my lovely friend Arika so sweetly gifted me this skein to make my own since the pattern is named after her generous self. It's going to be so pretty and I cannot wait to wear it! Aren't those tones just so lovely together?

I also have projects coming up soon with the new Lotta Jansdotter line Sylvia! You guys know how obsessed I am with anything Lotta related. I even have Lotta washi tape thanks to my pal Holly! I am currently planning on covering my house in these prints to match my fave rug. I can't wait to show you them and when I do...you may get some too!!!!! I love being sneaky...hehe.

Then I have been drooling and I mean drooling over the gorgeous new line Sweet As Honey from the oh so insanely talented Bonnie Christine from Going Home to Roost for Art Gallery Fabrics! Seriously, even my package that came with my fabrics from her was drool worthy! I'll be showing you all what I will be making on the 25th as I'm lucky enough to be part of her Sweet As Honey Blog Tour! There have been some lovely projects made already! You can see them all here!

And those last 2 pics above...yep....that lovely stacked pile of goodies? I get so excited just looking at it! I loooove that everything in that pile is made by me (sans the wood buttons)! I hope to wear some of them this weekend! That's right! That is what I'm packing for our trip tomorrow!!!! YAY!!!! It's here! Jane and I leave tomorrow for the US! Don't forget we will be at Tolt Yarn and Wool on Thurs night from 6-8pm (come see us!!!) for a signing/trunk show and then you can find us at Vogue Knitting Live in Seattle all weekend! Our trunk show will be up at the Stash Local Booth #310 and we will be doing a book signing on Saturday from 12-2pm! You will be able to see pics from this weekend on my instagram! We can't wait to see all of you! And just in case you are nosy like me the items in the pile are as follows starting from the top of pile...Antrorse, Josephine, Tova, Sigma and Saiph! YAY!

So what have you been making? Any projects you're dreaming about? Grab a cuppa Tim Horton's and join me! Let's chat!!! See you all next week! Happy creating!

Tim Horton's and knitting \\ www.veryshannon.com

SEWING || JOSEPHINE TUNIC IN LUDLOW!

Josephine Tunic by Made by Rae // Sewn by VeryShannon.com

I recently got some time in to do some sewing for me. One of my goals this year is to sew as much of my wardrobe as possible & I've been having so much fun with it!

When Rae released her newest pattern - Josephine I knew I had to make it right away! Luckily I had just gotten my hands on Dear Stella's new line Ludlow that is a lovely cotton shirting! I fell madly for this adorable floral print Rosebuds that I thought would pair nicely with the feminine pleats and style of this tunic! As some of you discussed on instagram...I feel very Anne of Green Gables in this dress and love every bit of it! The puffy sleeves, pleats....need I say more? I looooooove Anne of Green Gables so this dress just makes me happy.

Josephine is filled with options! It's an awesome pattern but the best part - you can make it for your bust size!!! You can choose to make either A/B cup or C/D cup! I swear I did a happy dance Rae! I had to make zero adjustments for my bust! And not for the back either! That is a win win for me!!!! Plus those pleats - so fun to sew!!!! I loved that detail! I decided to make Option A but with the back of Option B (the elastic waist)! See - options! You can mix and match!


Josephine Tunic by Made by Rae // Sewn by VeryShannon.com

I can't wait to make another one with a more flowy fabric so I can try out the wider sleeve with elastic on the cuff! I think the blouse version will be next for me in a lovely solid! Rae's patterns are always clear to follow and easy to sew! I highly recommend Josephine especially for someone looking to hide some of those "parts" they don't want to highlight. This dress skims over the tummy instead of highlighting my problem area! It's a great length so I can show my legs but I also don't feel like my bust is exposed and I like that! It's nice to have a cute tunic that I can wear doing all my daily errands but can still play with the kids in since I don't have cleavage falling out everywhere!

I sewed the size XL for upper portion of the dress and graded out to the XXL for the lower. Now that I've sewed this one up though I would just make the XL for the whole dress next time. I didn't need the excess fabric that I thought I would for the waist/skirt portion. Since I'd like to try one without the elastic casing on the back this would be a must make adjustment for me. Before the elastic casing this tunic was way too big on my hips/back portion. Overall though Josephine will be a repeat sew in my house. I cannot wait to make another one!!!

Josephine Tunic by Made by Rae // Sewn by VeryShannon.com

I paired my Josephine with some cute boots, black leggings and my fave socks! How would you wear Josephine? What fabric are you going to use? Options you're making? Have you made one already? I can't wait to hear!
 Tunic: Josephine by Made by Rae
Size Made: XL graded out to XXL
Fabric: Rosebuds from Ludlow by Dear Stella
Boots: Payless Shoe Store

P.s. Yes, I know my little size tag says "L". It's for large. I like to label my clothing what size I would wear from a store (ready to wear) instead of my "sewing pattern size". Weird I know but it's how I remember what size I sewed.